Gain access to our online course, Retouching for Product Photography for free thanks to Adobe!
Use the code ADOBEFREE to redeem your free course. Limited to the first 500 signups.
Missed the course? Scroll down to gain access to our HDR Toning Presets for free!
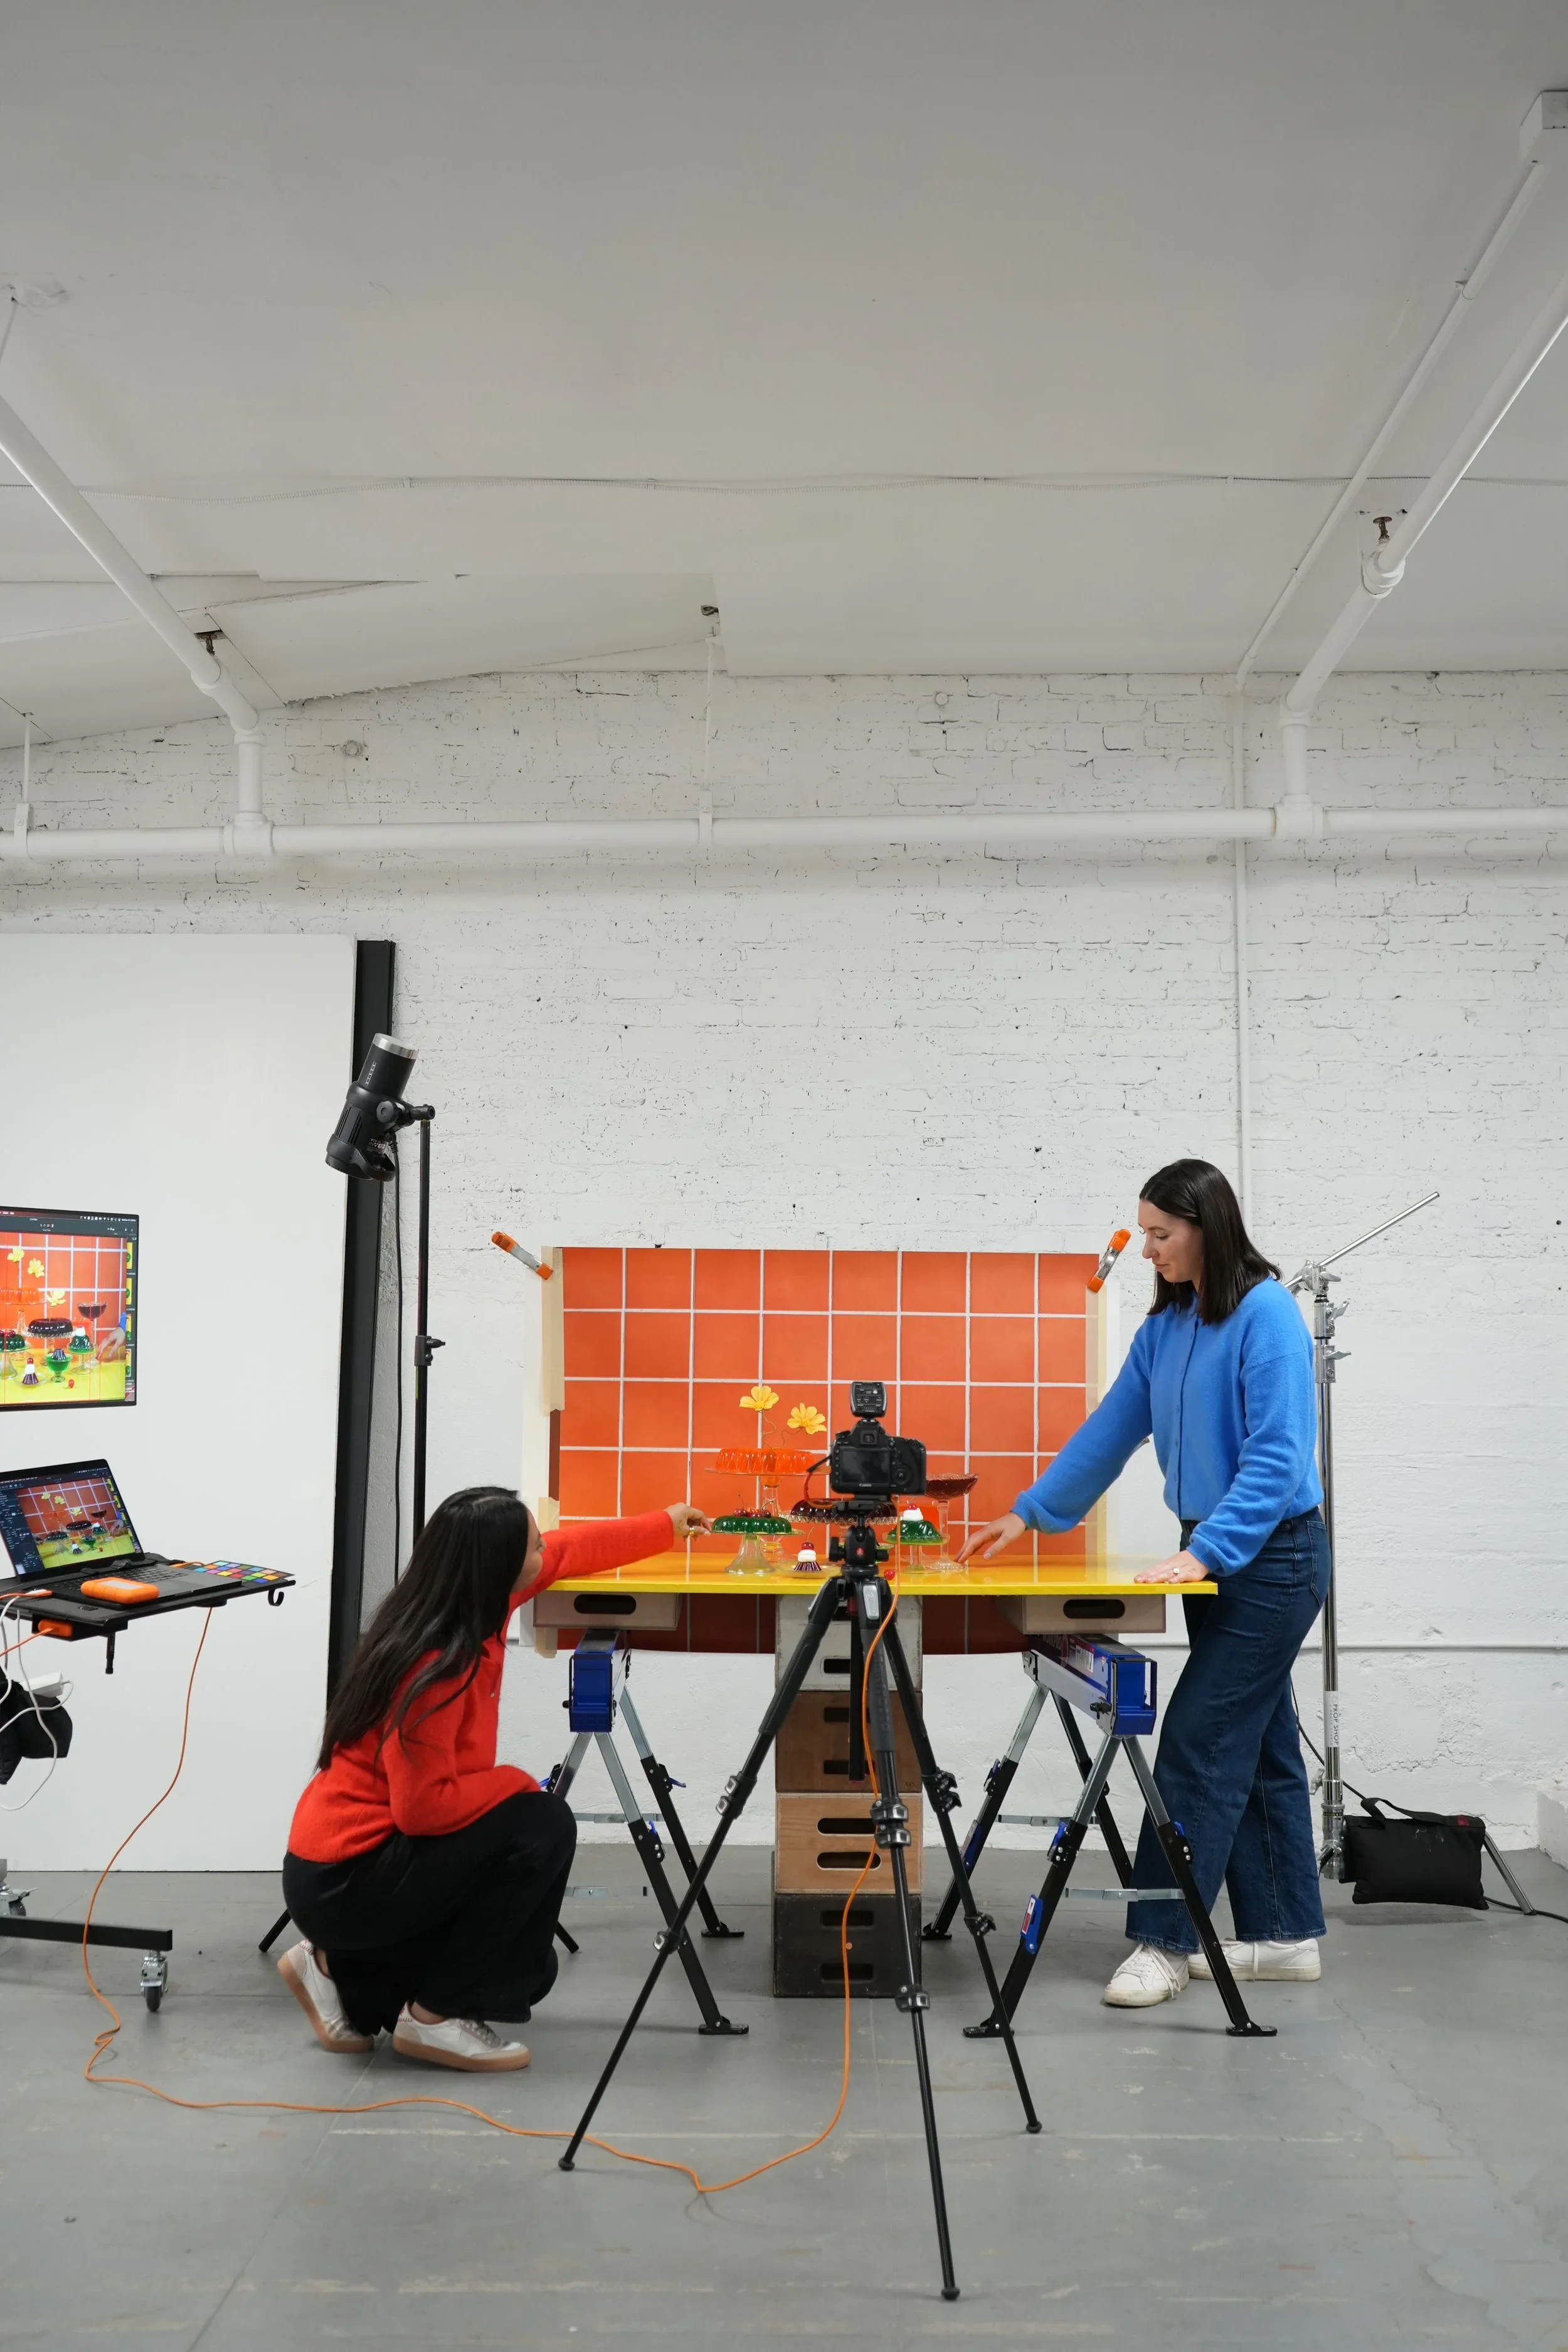
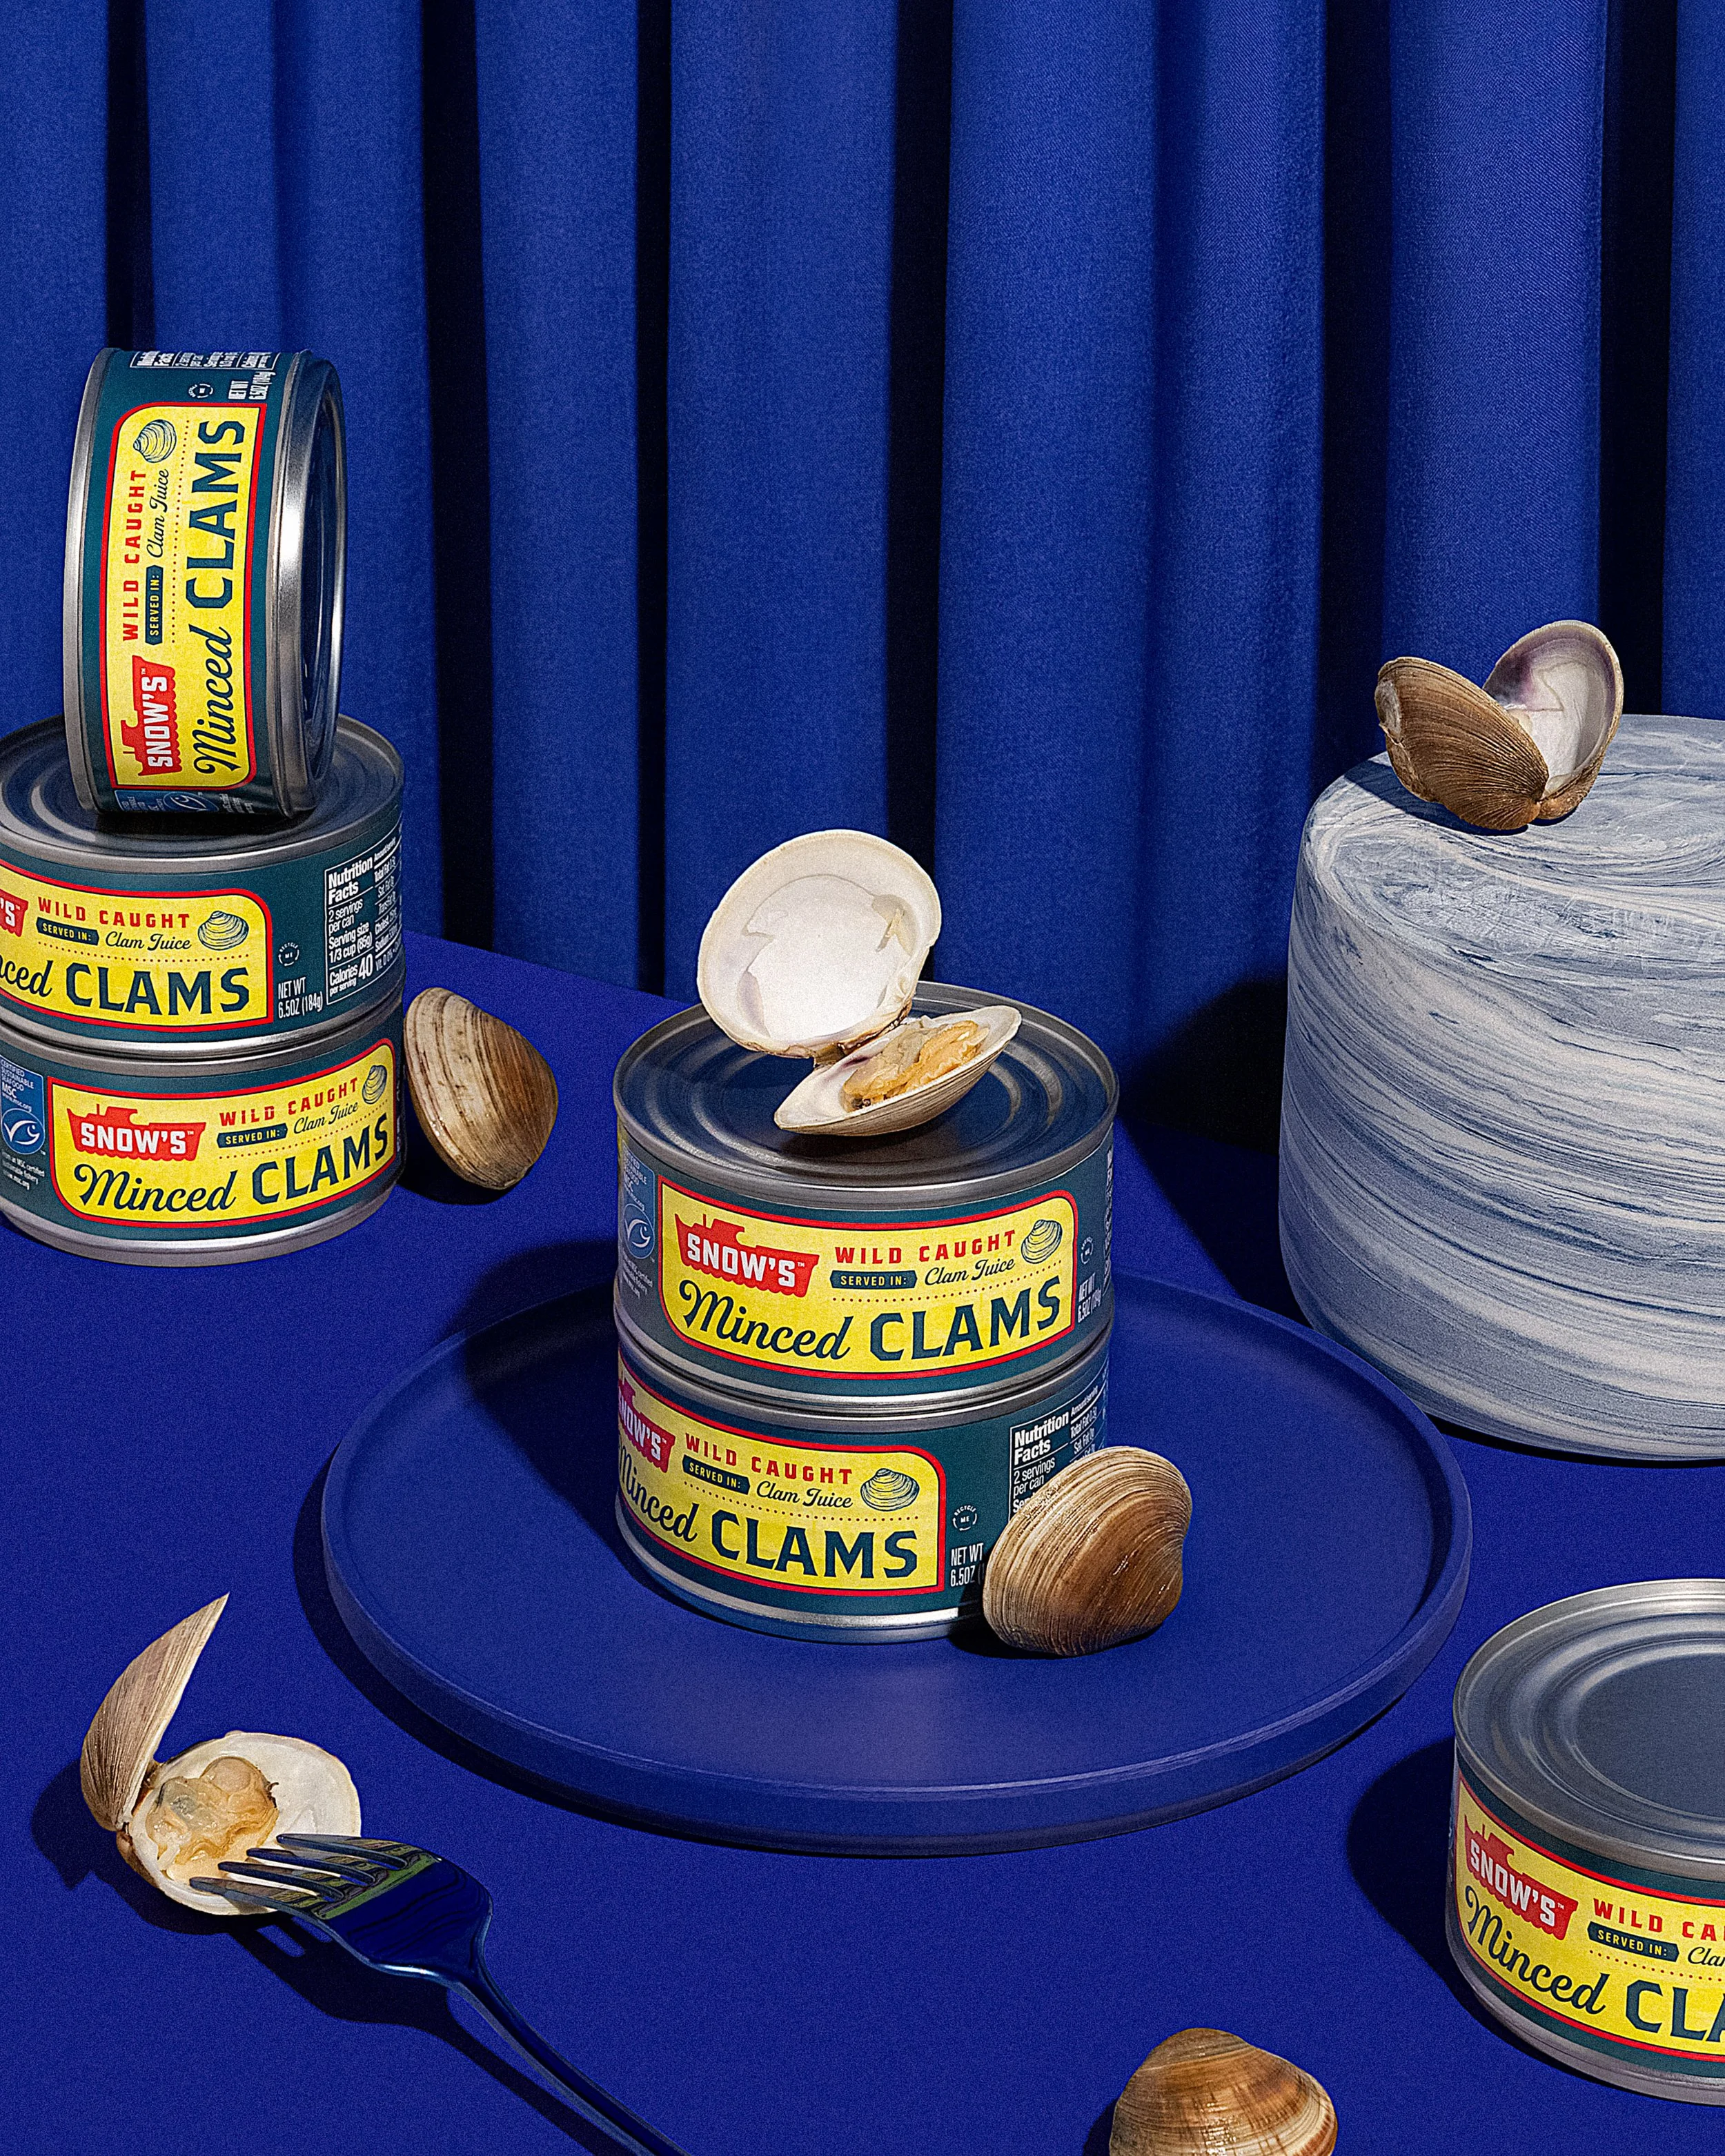
In our Retouching for Product Photography course, Arabela is pulling back the curtain on the exact tips and tricks we use when retouching images for our clients. Starting with prepping images in Lightroom and then getting into the heavy lifting in Photoshop, Arabela’s showing everything from adjustment layers and blending modes, to adding depth, extending backgrounds, and exporting for the web.
Starting with prepping images in Lightroom and then getting into the heavy lifting in Photoshop, Arabela’s showing everything from adjustment layers and blending modes to adding depth, extending backgrounds, and exporting for web.
Plus we’re including three bonus lessons on recently-released tools you won’t see in older retouching courses that are game changers for speeding up your process!
To cap off the course you’ll complete a final project — AKA, your time to SHINE by editing some stills with the techniques Arabela taught you!
✺ Units + Lessons ✺
-
1.1 Image Prep Intro
1.2 The Basics (File Formats + Color Management)
1.3 Organizing, Importing, and Culling in Lightroom
1.4 Basic Adjustments (WB, Lens Correction, and Transform) + Pasting Develop Settings
1.5 Lightroom to Photoshop + working non destructively (layer masking, smart objects)
-
2.1 Compositing Intro
2.2 Compositing to Extend a Background
2.3 Removing Unwanted Objects
2.4 Compositing Extra Products/Props
2.5 Compositing Products with Different Lighting
2.6 Focus Stacking
2.7 Compositing A New Image from Scratch
2.8 Compositing A Pattern
-
3.1 Transforming and Cropping Intro
3.2 Guides + Rulers
3.3 Camera Raw Filter > Geometry
3.4 Transform Tool (Skew + Warp)
3.5 Liquify Tool
3.6 Straighten + Crop Tool
-
4.1 Retouching Backgrounds Intro
4.2 Smoothing Backgrounds
4.3 Smoothing or Extending Background Edges
4.4 Retouching Fabric (Wrinkles, Fixing Curtain Folds, etc)
4.5 Removing Unwanted Objects with the Spot Healing, Clone, and Stamp Tool
4.6 Bonus Lesson: Live Gradient Tool
4.7 Bonus Lesson: Generative Fill
-
5.1 Retouching Products + Props Intro
5.2 Dust & Scratches
5.3 Removing Blemishes with the Spot Healing, Clone and Stamp Tool
5.4 Transform Products and Props
5.5 Bonus Lesson: Remove Tool
-
6.1 Adjustments & Blending Modes Intro
6.2 Using Levels and Layer Masks to Adjust Exposure
6.3 Adjusting Prop Colors
6.4 Adjusting Backdrop Colors
6.5 Applying Color to a Gray Background
-
7.1 Dodge & Burn and Sharpening Intro
7.2 Add Depth using Dodge & Burn
7.3 High Pass Sharpening
-
8.1 Exporting Intro
8.2 Exporting from Photoshop
8.3 Exporting from Lightroom
-
9.1 The Final Project


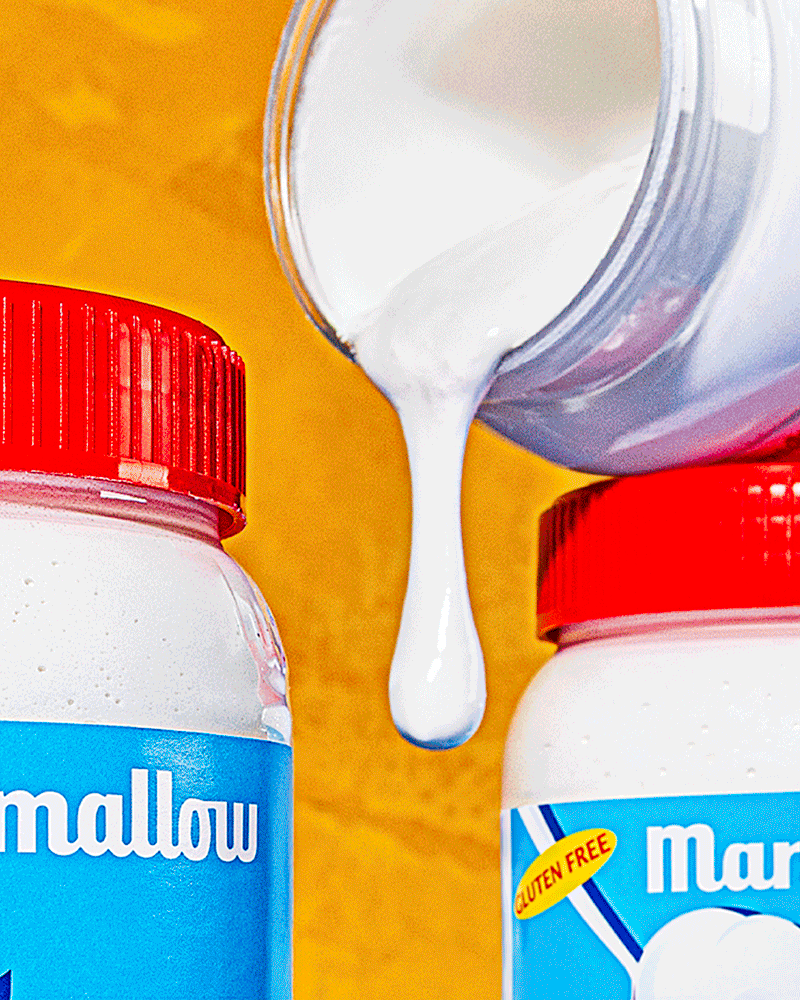
We love adding punch and texture to our images and one of the ways we achieve that is by using HDR Toning Adjustments in Adobe Photoshop.
Enter “The Oomph” and “The Grit.” Easily installable, these two HDR toning presets help bring out alllll those details when combined with blending modes.
"The Oomph" is the preset that packs a real punch making an image go from good to great. You can double it up and try different blending modes for a truly unique effect.
"The Grit” is the preset that brings in all the texture and well… grit! Consider this the high pass sharpening method on steroids. It’s a fun one!
Be sure to follow the instructions for how to apply these presets because they’re not a one-click solution.
It can take a bit of time playing around to find the right settings but they’re sure to really add that special “oomph” to your photos.
We hope you love these presets as much as we do! Make sure to tag @weekendcreative so we can see and share what you create!
(Click purchase to download, you will not be charged).
Other resources to help you take your business to the next level:
This is a beginner-level course for product photographers who want to feel more confident with studio lighting. You’ll learn lighting basics, how to shape and communicate with light, and the equipment needed to get started. Follow step-by-step setups for one, two and three light set-ups, plus get a retouching overview of each final image. By the end, you’ll have a clear, practical foundation to create clean, professional product images with confidence.
-
![]()
Pricing Guide for Commercial Photographers
You deserve to be compensated fairly for your work and feel confident quoting prices that truly support your business. Our 70+ page Pricing Guide helps you price with clarity, confidence, and purpose.
-
![]()
Commercial Photography Contract Template
The EXACT agreement we use in our business to deliver protected, high-level work. A rock-solid contract designed to save you time, give you peace of mind, and attract the right clients.
-
![]()
Commercial Photography Treatment Course
How do you win jobs as a commercial photographer? It comes down to presentation. Our Commercial Photography Treatment Course includes a customizable treatment template to help you pitch with confidence.