

Before & After: Anecdote Candles

Hi everyone! I'm back with another before & after post featuring one of our longtime clients, Anecdote Candles. Instead of focusing on an entire shoot this time though, I want to take a look at one of our stills/stop motion specifically because there were a lot of moving parts to creating it (literally and figuratively haha!) Let's get into it shall we?
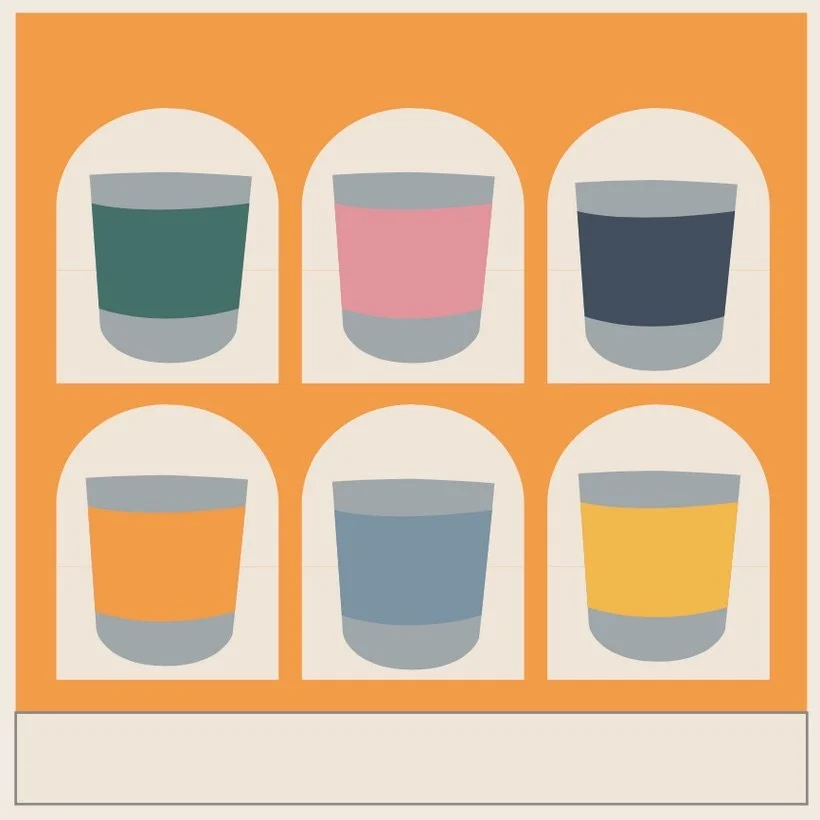
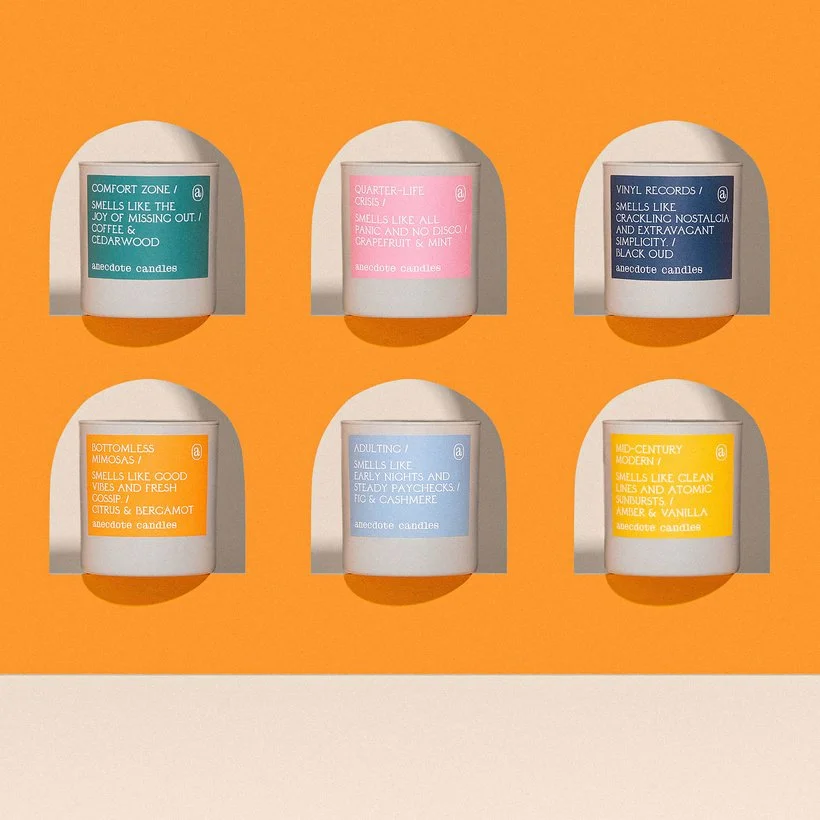
For this shoot, our client wanted us to create some imagery and a fun little animation that featured their new candle vessels. At first, I wasn't particularly fond of the new "look" of our clients' candles but eventually it grew on me. Elle did a fantastic job coming up with this idea for the GIF which essentially was supposed to give the vibe that it was some sort of home and each candle would be in a "room" and appear through an arched window. For reference, check out her mockup below:
Super fun idea/concept and Elle got to working and created her backdrop out of particle board, cutting out each arch for all 6 candles. Once it was the actual shoot day, we realized it was going to be much easier for me to do most of the work in Photoshop. And by that, I mean that instead of us trying to photograph every frame of the stop motion (candles appearing one by one), we would just photograph the necessary plates in order to build it out in post. It might just be easier for me to explain myself with some screenshots so check it out below:
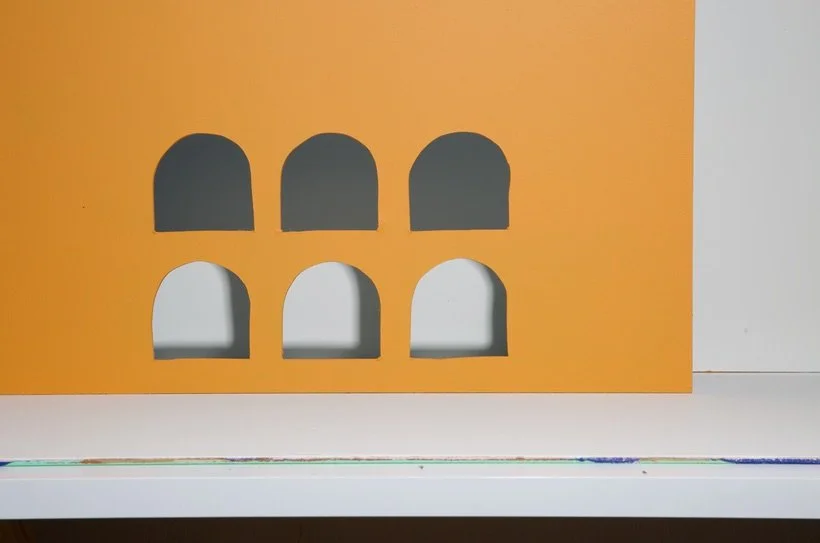
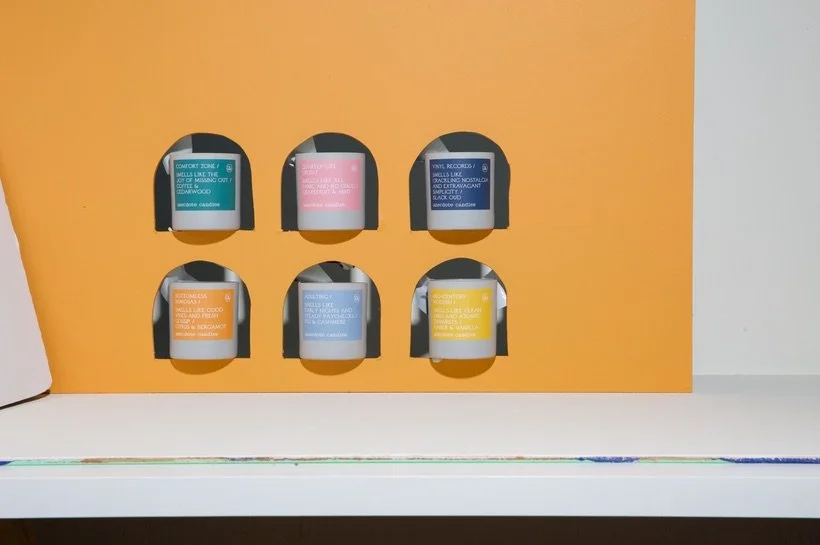
Don't you just love looking at the before shots? I'm always in awe because they almost always look so wonky! Anyway, so the way we made this happen was by first photographing the backdrop with no candles. We did this so that we could get a clean shot of all of the arches and to be able to get a good plate for the arch shadow in the back. Next we carefully taped every single candle (using black gorilla tape) to each of the arched windows. It was kind of crazy but we made it work! We were very careful to make sure that none of the tape was covering anything towards the front of the candle vessel. And that was it! Now it was time to create some magic in post and get all the deets just right.
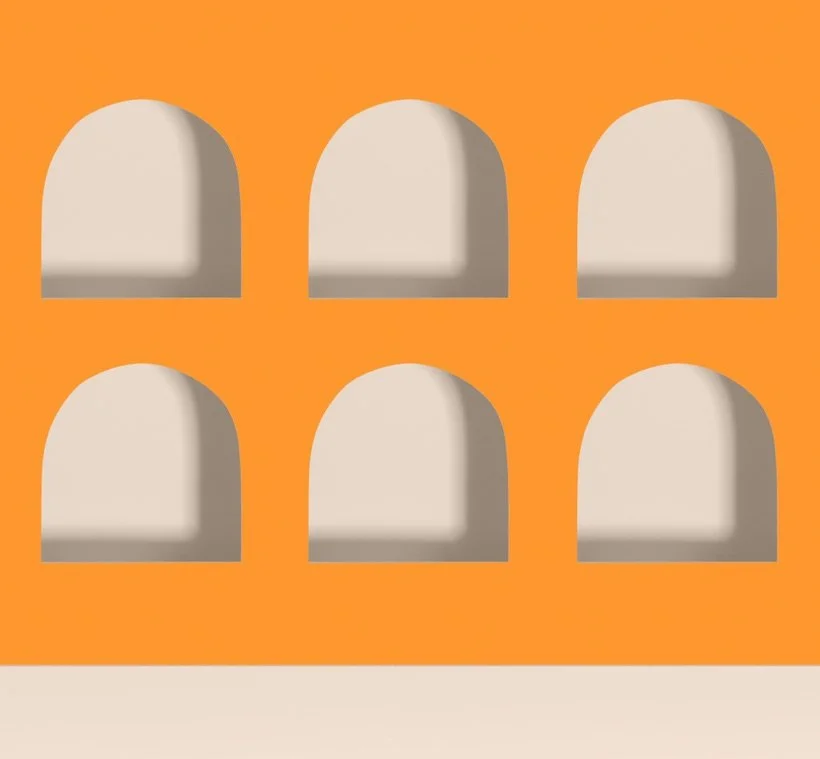
The first thing I did in post was to select the best looking "arch" and the best looking "arch shadow", fix up both so that they looked polished and then legitimately copied it and pasted it onto the rest of the arches so that it was the same shape/look. I also brightened up the "windows" a bit too!
From here, I selected the best "candle shadow" and cut out both the candle vessel and shadow to be able to place on every window. In this case, the one that looked the best was the "Adulting" candle.
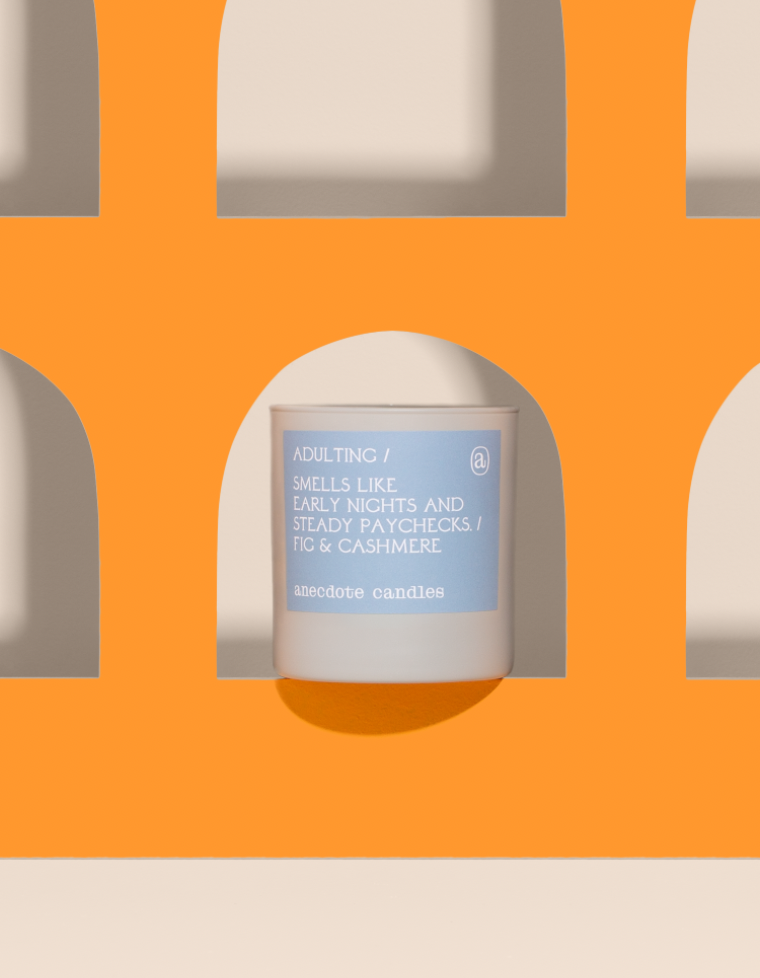
I then duplicated that layer multiple times and placed it in every window which made my job easier since I didn't have to go in and manually select every candle. Since the candle vessels are all the same and the only thing that's different is the label, I just cut out the label (of the other 5 candles) and pasted it like so! I love it when we can make something easier for ourselves but not making it as complicated but sometimes it takes a bit of workshopping and troubleshooting during the actual shoot to get to a solution.
So there you have it guys! If you're interested in seeing how it all came together, I'm more than happy to make a edit with me video on this if that is helpful! :) Definitely let us know over on Slack if you've ever had any realizations during the shoot about how much more effective it might be to Photoshop a certain animation instead of trying to do it in camera!
Is it the weekend yet?
Arabela