

Adding Texture with Styling
Hello WC Members!
I'm so blown away by all of the photos you guys took for our first challenge! It was so fun to see what you all did and I loved how everyone did something different. The level of talent here is next level! We'll be announcing another one next month so stay tuned!
Today we're going to be talking about adding texture to your images through styling. One thing to always keep in mind when you're planning and styling your images is that every single thing that you include in your images communicates something to the viewer. This is why every decision that we make is so important. There are definitely choices that we make just because they look good, but it's important to be as intentional as possible and think about why you're making choices and what that choice will say. This is how we build images that tell stories, we think through the details and make sure that they're participating in the larger story and not distracting from it.
Another thing I want to point out is that smooth is a texture. I think sometimes when we talk about texture we think that it has to have, well, texture haha. The thing is that sometimes we actually want things that are smooth and shiny or just untextured because that communicates something. While I do really love mixing textures, especially with backgrounds, it doesn't always make sense to add something textured into the scene.With that, let's get into it.
Backgrounds
I love creating texture in our backgrounds - you all know how I love a good tile shot haha. Tile is a great texture, but there are so many other options. Concrete, painted surfaces, fabric, crinkled paper and so much more can be used to add texture into the scene. You can also create texture using items like wooden dowels, or even roofing material - I've demoed this in a couple videos for the Saturday and Sunday members. While we love our plain painted particle board (and still shoot with it all the time), adding in some texture can help bring your scene to life and make a shoot feel very unique. Here are a few examples from some of our work -
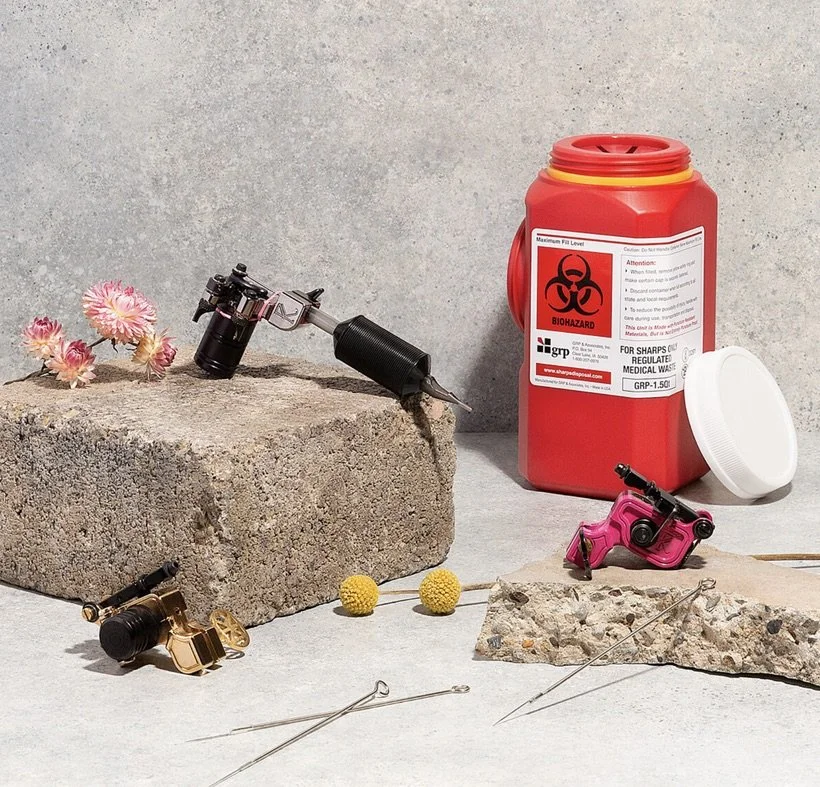
This shoot was super interesting because it was for a tattoo artist. She specializes in really detailed and delicate animal tattoos and her studio has a lot of pink so we wanted to create something feminine while also making sure there was some grunge. We decided to incorporate concrete and used these painted backgrounds as part of the sets.
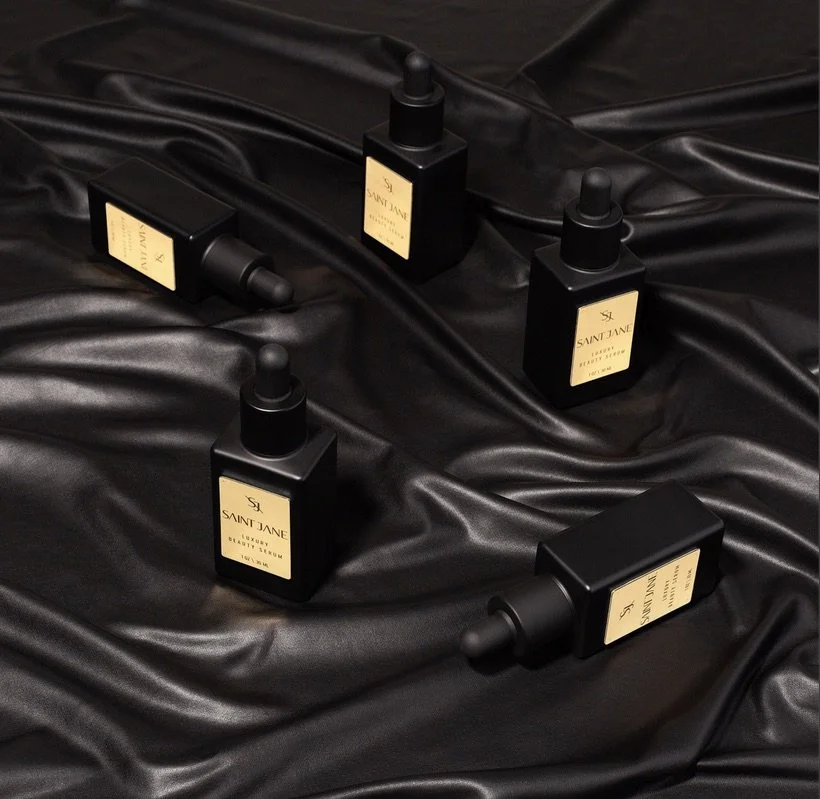
This shoot for Saint Jane was very elevated and elegant. They're a luxury brand with an expensive product. Most of the shoot was in black and tan and we incorporated a variety of textures, but this one was one of my favorites. I found this fabric that was like a fake leather so the light bounced off it and it created almost a black water effect. This is a great example of a smooth texture that adds a lot to the scene.
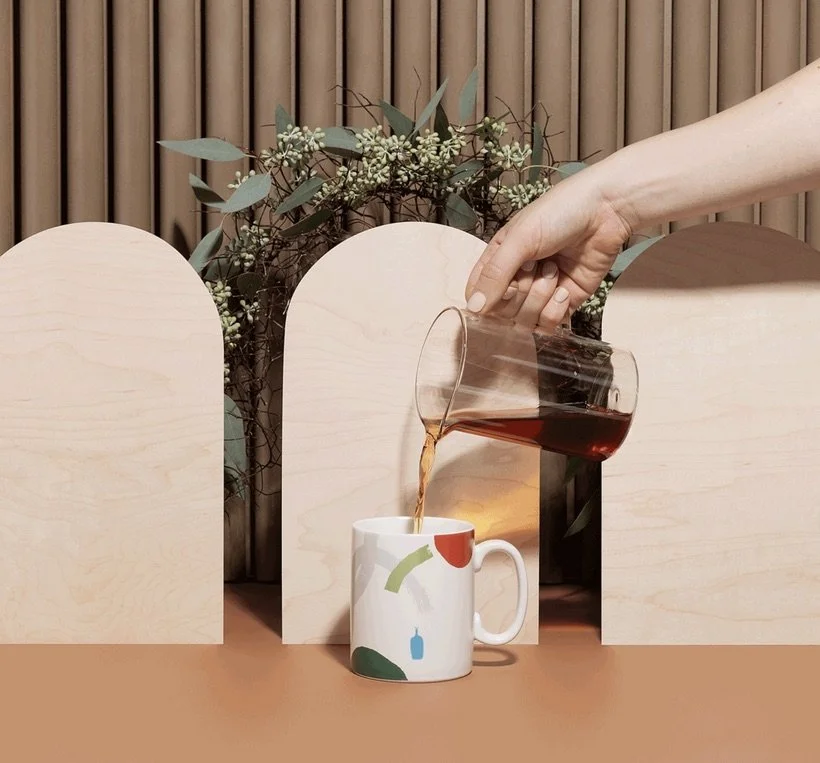
I also love combining textures because it creates a lot of depth. The sets for Blue Bottle were inspired by their cafes which use a lot of plywood. I cut out these arches from raw plywood and then used wooden dowels on particle board to create the background. The leaves add another layer of texture and then the bottom is smooth to give the eye a space to rest. That's another point - be careful about adding TOO much texture or overwhelming the scene. It's a good idea to think about white/blank space and making sure there are some resting point(s) for the eye.
Fabric
While fabric can be the entire background, you can also use it to add texture to just one part of the scene. You can use a silky fabric to communicate elegance and glam or something more organic. Here are a couple examples:
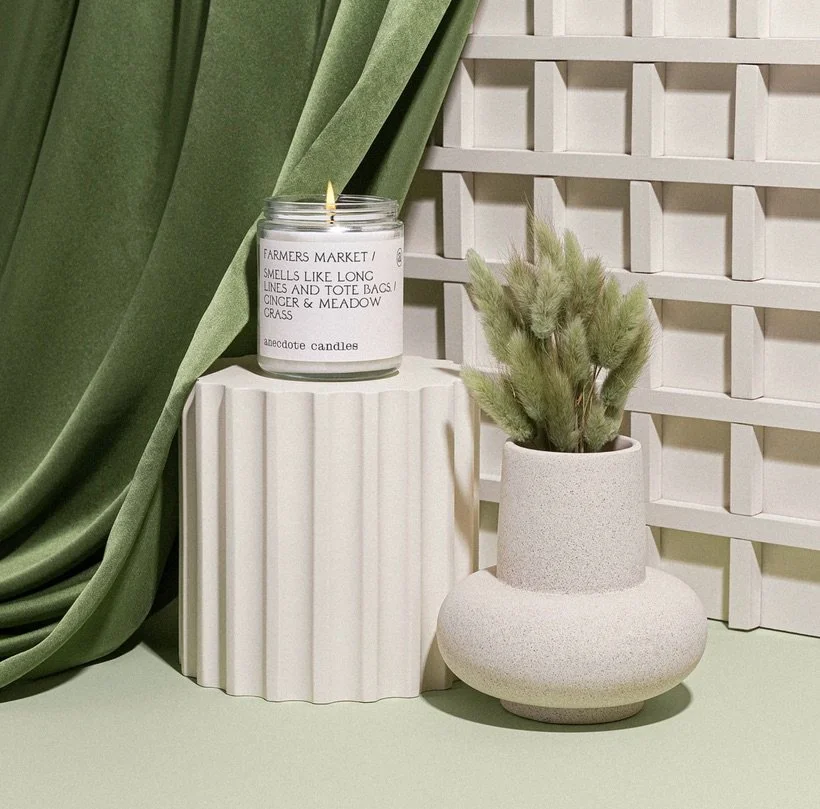
Velvet is one of my favorite textures to photograph, it just always looks good. Here there are quite a few textures going on, starting with that velvet, then the grid, the column, the vase, and the bunny tails but note how the bottom is smooth and without texture.

Fabric not only adds texture, but it's a great way to add movement in a scene. I love how it flows from left to right in this shot, bringing your eye to the candle.
Another shot from that shoot - here we have some faux fur fabric which I LOVE haha, it's so playful and quirky. Definitely adds a lot of texture (are you tired of hearing me say texture yet? I feel like I've typed it 100 times lol). Because that fur adds so much texture, we kept the rest of the elements smooth in order to not overwhelm the scene. This is definitely not a hard and fast rule, sometimes more texture is better, it all depends on what you're going for, but again, we have to think about these choices and intentionally decide what makes sense.
Here we have just a tiny bit of texture from the napkin, I wanted to add it into this scene because everything else was so smooth and I felt like it needed a little bit of contrast. It's subtle but it definitely wouldn't be the same shot without it.
Props
Another great way to add texture is through the props that you use. This is pretty easy if you're working with food and flowers because those things will naturally add some texture, but think about the other elements that you use as well. As a general rule of thumb I tend to think it can look good to mix textures in your props and make sure they aren't all the same unless you're going for a very minimalist look.
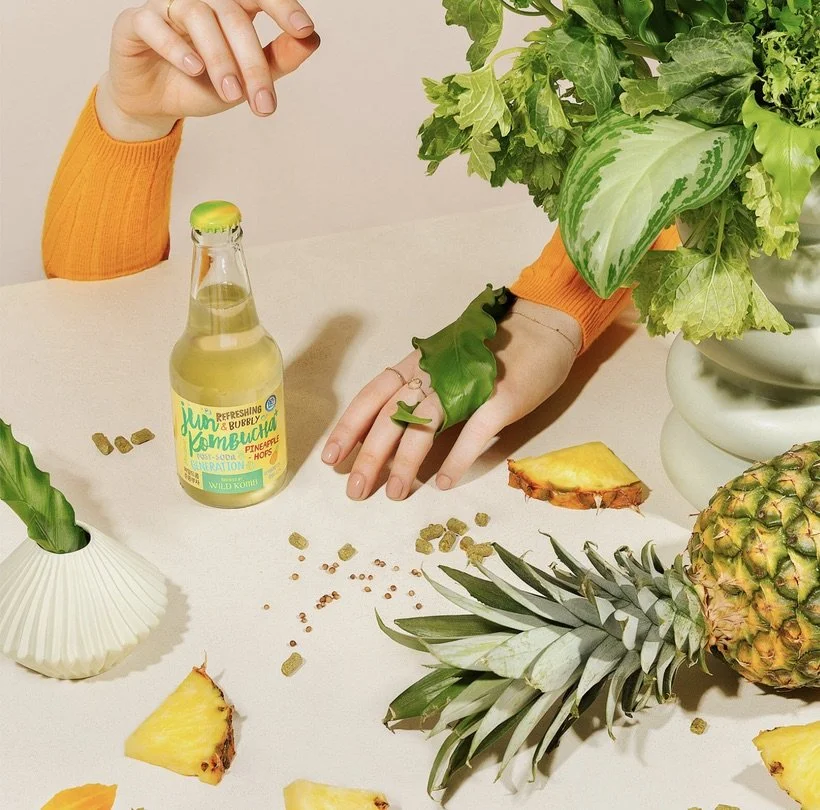
We added texture into this shot not only through the sweater but also through the pineapple, pineapple pieces, vase, leaves, and hops. It's got a lot going on, but the limited color palette helps tone it down a little.
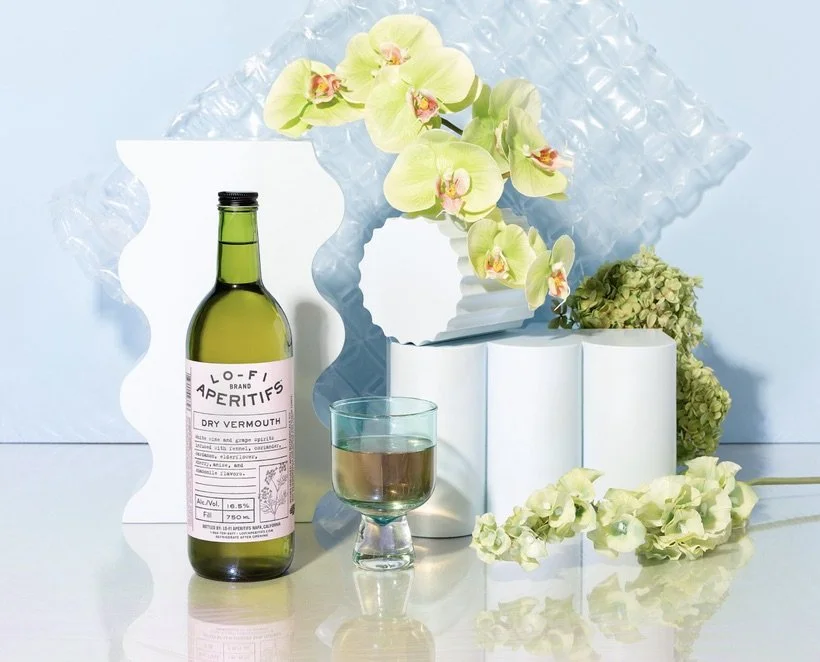
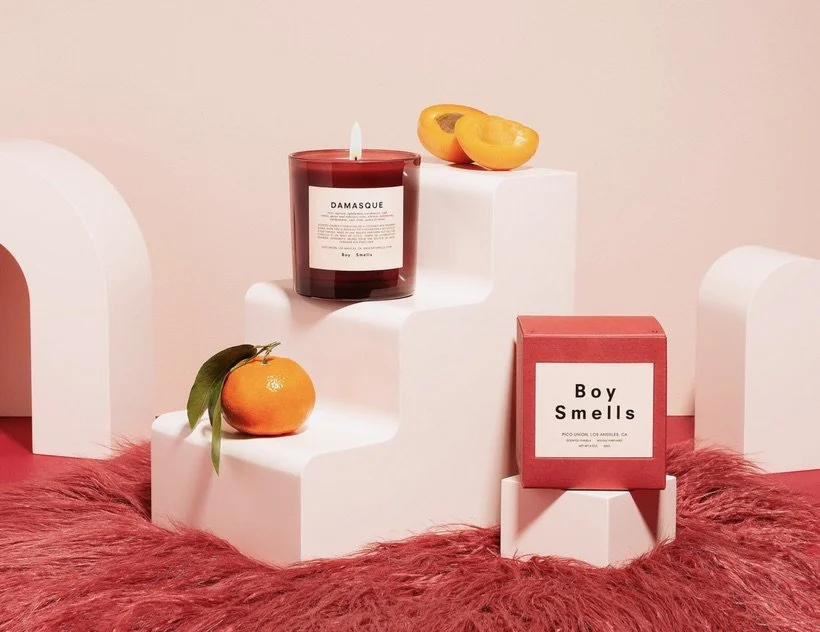
Here's an example where the texture of the background and of the props is super contrasted. The background is extremely smooth and reflective, and the props have a lot of texture, especially the flowers and bubble wrap. The moodelier pieces are smoother, but not quite as smooth as the background.
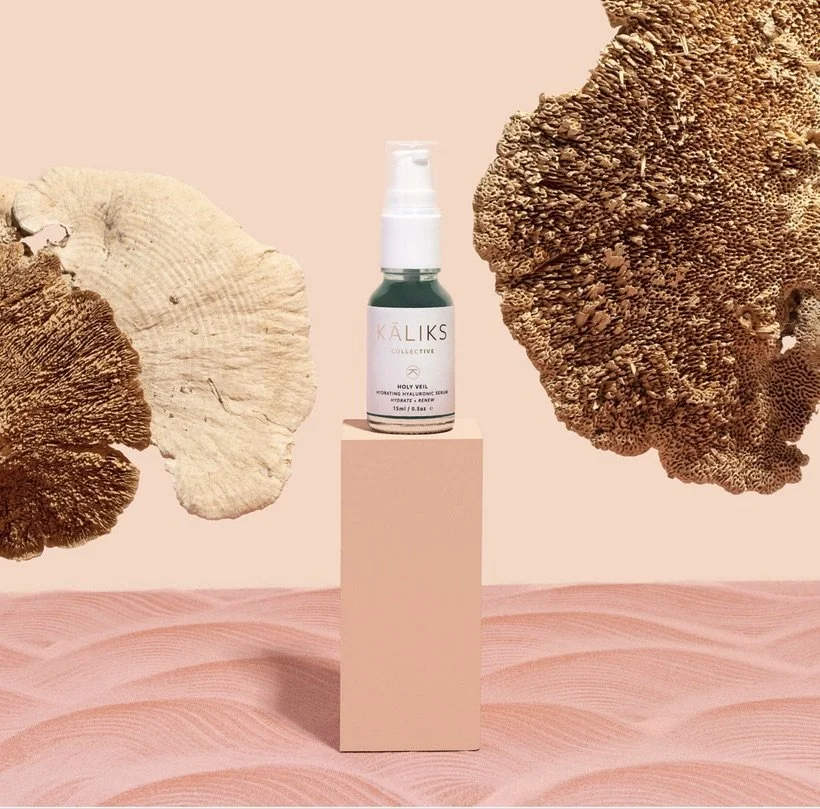
This was for a natural skincare brand so we wanted to use a lot of organic textures to emphasize natural. These dried mushrooms are incredible and actually an ingredient in this serum. They had an amazing texture and I love how they pair with the sand texture at the bottom of the scene. They're both organic shapes and they kind of mirror each other but have different qualities to them.
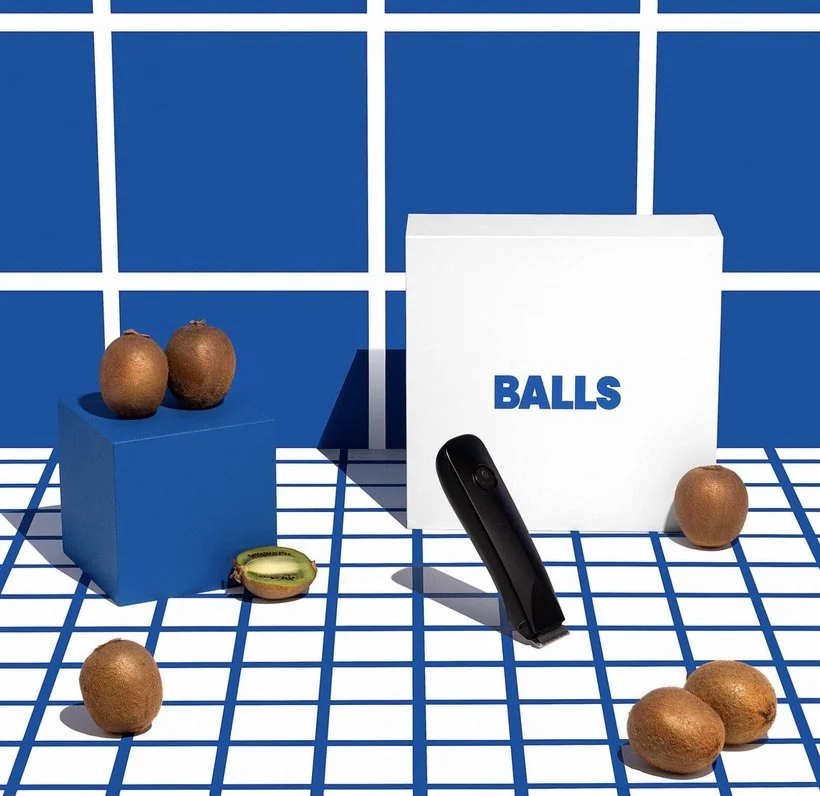
This shoot was for a male grooming company so we wanted to have a super smooth set with only the props having any kind of hairy texture haha.
The Products
Lastly you can also add texture through the products themselves, an easy way to do this is to add swatches of the product, cut it open, or pour it into a glass. You can also create texture on the product by doing things like spritzing if it if that makes sense for that kind of product. To be honest, I don't have too many examples to show you of this since we aren't great at product swatches and I don't like to show ours haha, but here
There you have it, a few ways to add texture into your shots! Let me know if I missed anything, I would love to hear your tips as well!
Is it the weekend yet?
Elle