

Using C-Stands
Hi guys! Hope you are all staying safe out there. We are currently in the South Bay and the California fires have finally started to calm down a bit thankfully. Hot summer days + smoke is not the best combination if you ask me... Anyway, I wanted to create a post that is completely dedicated to this one special tool. That's right, the c-stand! Most of you may already know what I'm talking about but if you don't, a c-stand is a common studio photography tool that can be used as a mount for lights, light modifiers, scrims, white cards, and other various lighting accessories. While all of that sounds great, the main idea for this post was to share some unique ways that you can utilize the c-stand beyond what it's commonly used for. We currently have two in our studio (we want more) and they have truly come in handy. Let's dive in!
The Basics
Ok, so I figured I'd start by knocking out some of the more common uses which includes using the c-stand as a mount for lights, light modifiers, white cards, etc. I think this is especially great for photographers who may be shooting medium to large-sized productions where they may need to get a light in a certain position that isn't quite manageable on a regular light stand. Because a c-stand can act as a boom, you have a lot more control of placement and it likely won't be in the way of the scene. Having that flexibility will allow you to style and fix things without the fear of tripping over your equipment. The same goes for light modifiers as well. While I don't have a BTS shot of us using our c-stand to place a light somewhere, here's an IG post from one of our inspirations, Adi Goodrich, in which a rolling c-stand is used to mount a softbox overhead. Another common way to use a c-stand is to hold up white cards/scrims up to your subject or product depending on the lighting style you're going for. As long as you've got plenty of metal spring clamps, you can pretty much place any kind of light modifier anywhere on your scene.
Camera Mount
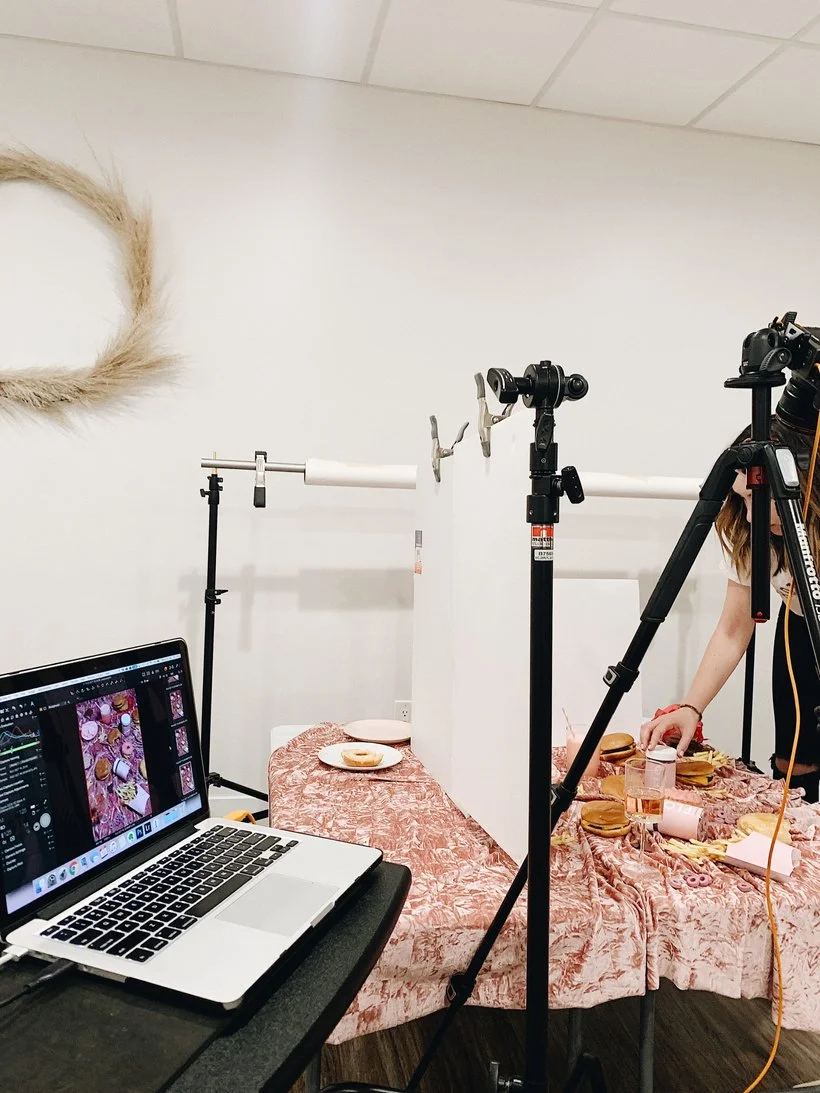
Ok, now to get into some of the ways in which we personally love to use our c-stands. Back when we barely knew what we were doing and before we had our space, we often rented other people's studios to create our work. (Which, btw, is a great way for you to try out different lighting and studio equipment.) One of the companies we were working with at the time consistently asked us for overhead shots and although we had our own tripod, the studio we rented for that particular shoot listed that they had one as well. So, we decided to leave ours at home. Big mistake. Lol! The tripod at the studio was missing a part and so we had to get crafty. One of the employees that worked for our client and was there at the shoot was pretty savvy with equipment. He suggested we check to see if the space had an adapter so we could mount our camera to a c-stand. In that moment, I probably died from embarrassment for not knowing better but I was thankful that they weren't rude about it and just genuinely wanted to help find a solution.
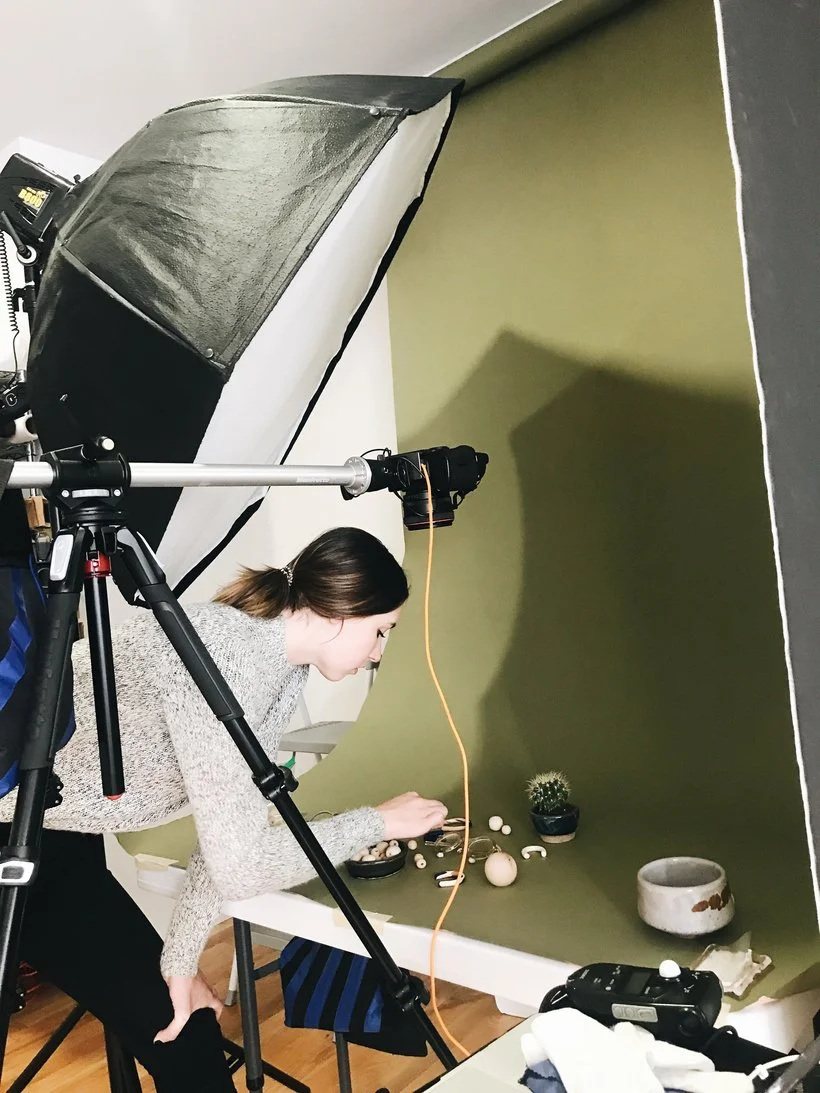
So, that's how we came to discover that we could actually mount our camera onto a c-stand with the right adapter. Although our tripod allows for overhead mount, the length at which it extends (even with the addition of a side arm) is not nearly as great as when you mount it on a c-stand. Going back to the flexibility point, it is so nice to be able to have the room to fix things and style without feeling like you might trip over the legs of your tripod. Some modifiers can also allow you to place your c-stand to the side so that you have all the room to style your scene from the front. Most of the work Elle and I create these days doesn't usually include a whole lot of overhead shots because we just personally love shooting from the front, the side, and often times at an angle. So, unfortunately I don't have a shot of our camera mounted on a c-stand but here's a quick video by the Bite Shot I found on Youtube that shows one of the ways in which you can do so. However, just so you know the struggle was real, here's an extremely old BTS shot where you can clearly see Elle hunched over trying to style while not moving anything. Not fun. We also used a 50mm lens back in the day which is nice but not very forgiving when it came to the distance at which we could place it from our subject. This was 2 years ago I believe and we've definitely learned a lot since then, haha! With that being said, if you're big on flatlays and overhead shots, a c-stand might just be your best friend.
Fabric + Backdrops
While we typically shoot on a lot of particle boards these days, we've definitely used our trusty c-stands to help prop up certain backdrops. Most of the time, our background support stand works just fine to lean and clamp our boards to but sometimes you need a little extra security so a c-stand can work great in this situation. Another fun little way that you can use your c-stand is to drape fabric or create "curtains." All you really need are a few spring clamps to hold the fabric in place and voila! When it comes to creating curtains, you'll want to bunch up the fabric and from there you can decide if you want it to look extra neat and perfect or if you want more of a loose feel. See both examples below. Easy enough right?
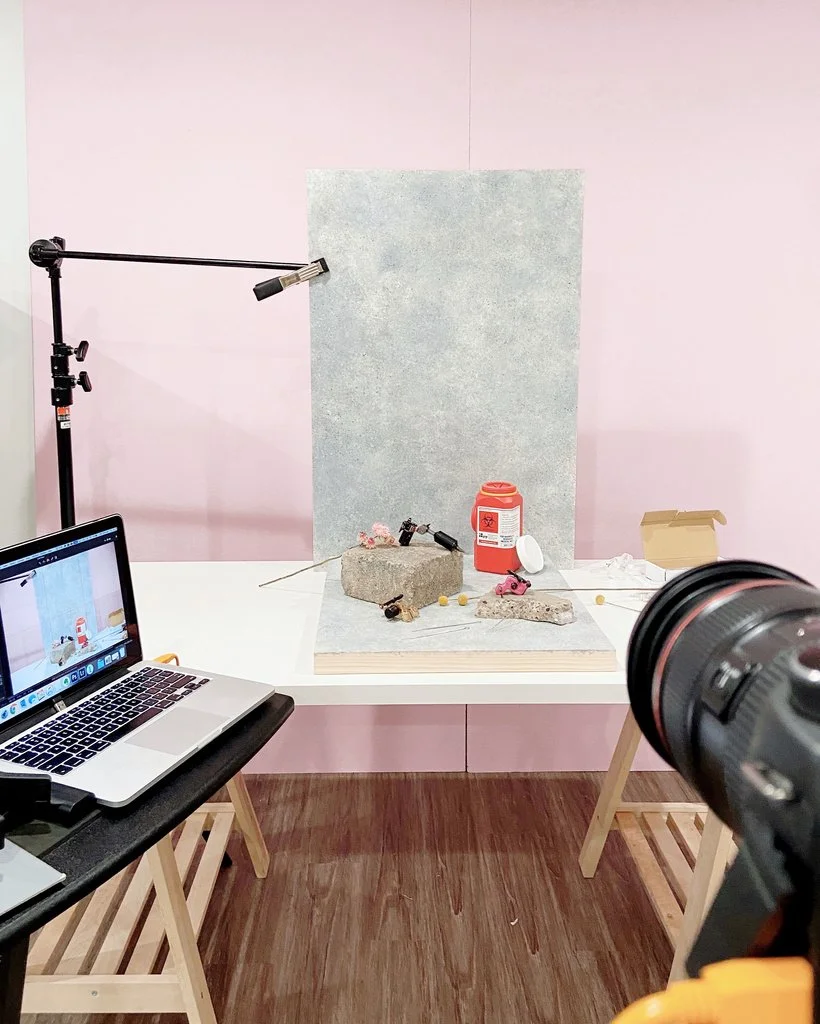

Props + Florals
This one's pretty self-explanatory but I thought I'd cover it anyway in case anyone is just now discovering this fabulous tool. Let's say you want to place a certain object or a floral prop in your scene and you need to figure out how to "prop" it up. Pun intended. This is where your c-stand really helps you out a lot and you don't have to keep asking your roommates or your siblings to help hold something up for the shot. Maybe you want to add a floral touch to the corner of your image or perhaps you want to create some sort of shadow. Having that c-stand to clamp some of these props and florals makes it feel like you've got a ton of assistants helping you execute the shot. It's pretty great. 😉
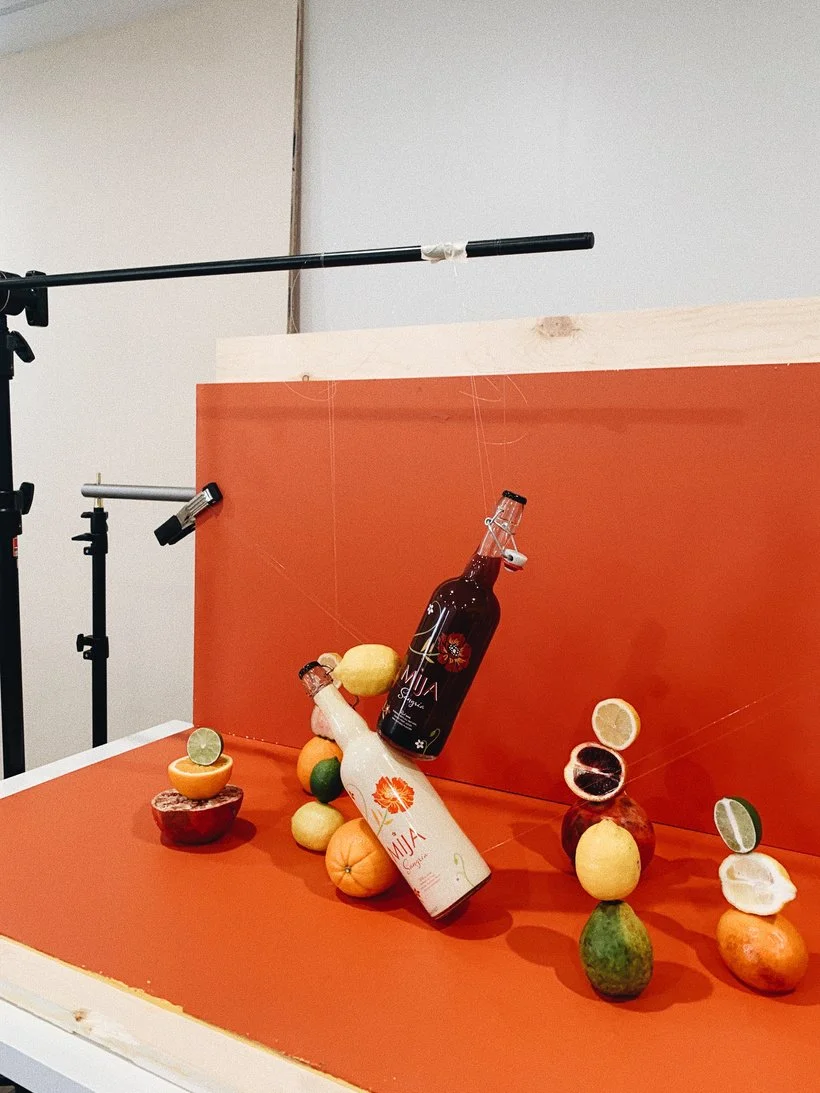
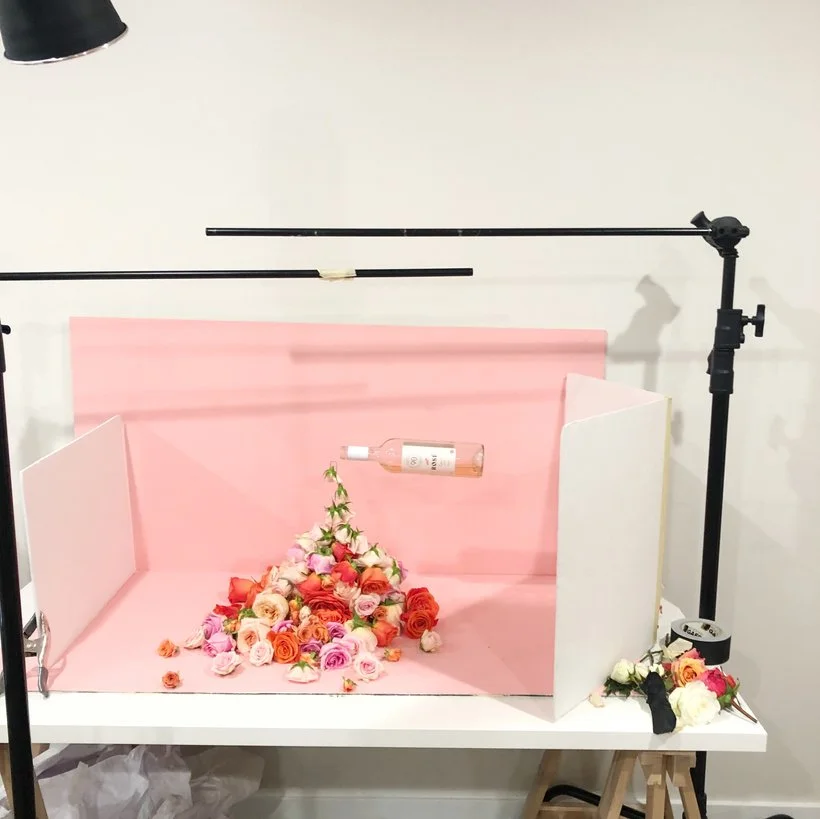
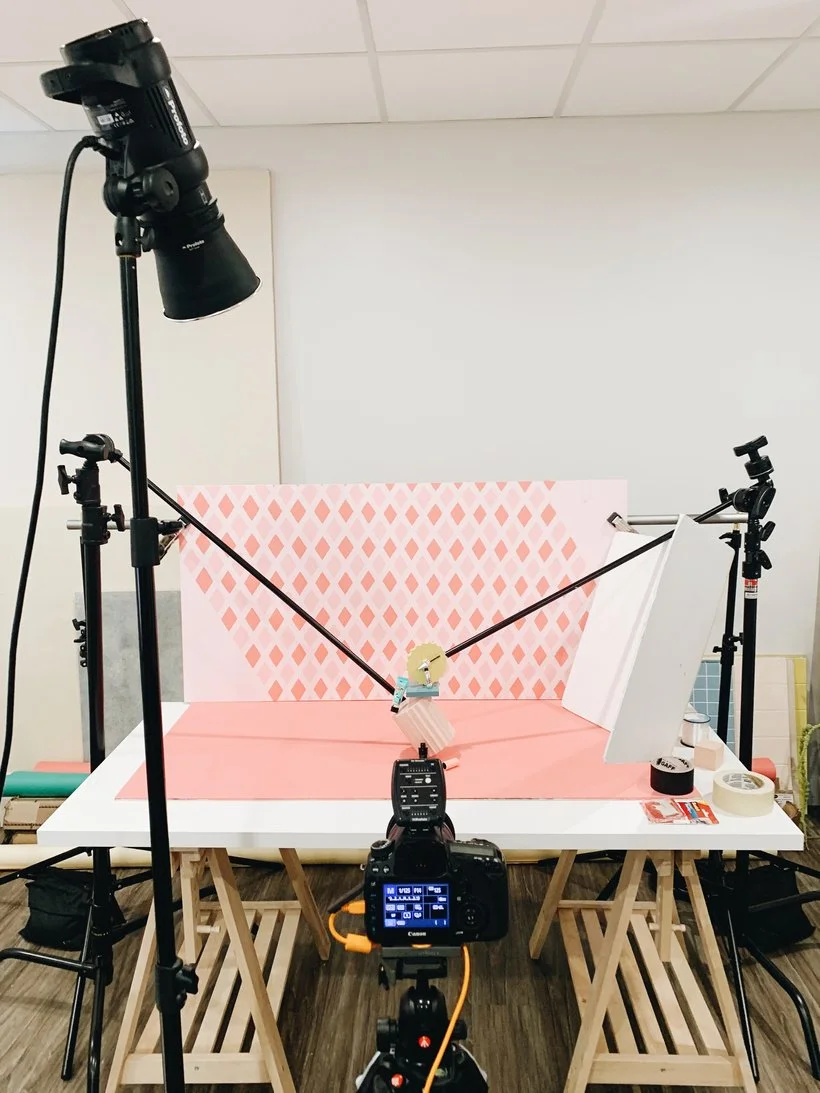
Levitation + Balancing
Ooh, our favorite! You may have seen some BTS shots of us using fishing line to hang things in the air or perhaps you've seen some some of our balancing product shots on Instagram. Guess what we used to make that happen? That's right! Our trusty c-stand, haha. As long as you've got a sandbag on it, you can count on it being super sturdy and heavy enough to hold even a bottle of Rosé! You can also use the c-stand arm to hold up a product or prop that's wide enough by taping it to the back. You might have to finagle it a bit to get the right angle but once you have it in place, it's a lot more secure than fishing line. Make sure to use a strong adhesive like masking tape or gaffers tape. If you need something stronger and don't mind the residue (or have multiples of products) you can always try gorilla tape. That should definitely do the trick. Then, once you've got your shot(s), all you have to do is remove it in post. See examples below.
Well, you've made it to the end. Thanks so much for reading and I hope you discovered some fun ways to use your c-stand that you may not have thought of before and if you know of any other ways that you like to use them, feel free to share it with us over on Discourse by making a new topic!
Is it the weekend yet?
Arabela