

White/Bounce Cards
Hey all you cool cats and kittens... Lol! Hope everyone's had a great Friday so far. If you're familiar with all of our BTS photos we share on both Weekend Creative and Little Sunday Studio, you'd probably notice how often we like to use white cards for our shoots. It's personally one of my favorite tools that we use religiously. Although many of you are quite familiar with it already, I still wanted to touch on it because there's a few fun little ways that you can use it besides just brightening up your shadows and sets.
If you're like... what is she talking about? I'll give you a brief breakdown. A white card is a piece of white poster board, card stock, or foam core that most product photographers use to reflect light from a source. This is the equivalent of portrait photographers using silver or gold reflectors to bounce light onto their models. White cards help brighten up your shadows and even out your lighting. It's super simple and one of the easiest ways to elevate your imagery whether you're shooting in natural light or in a studio.
Bouncing Light
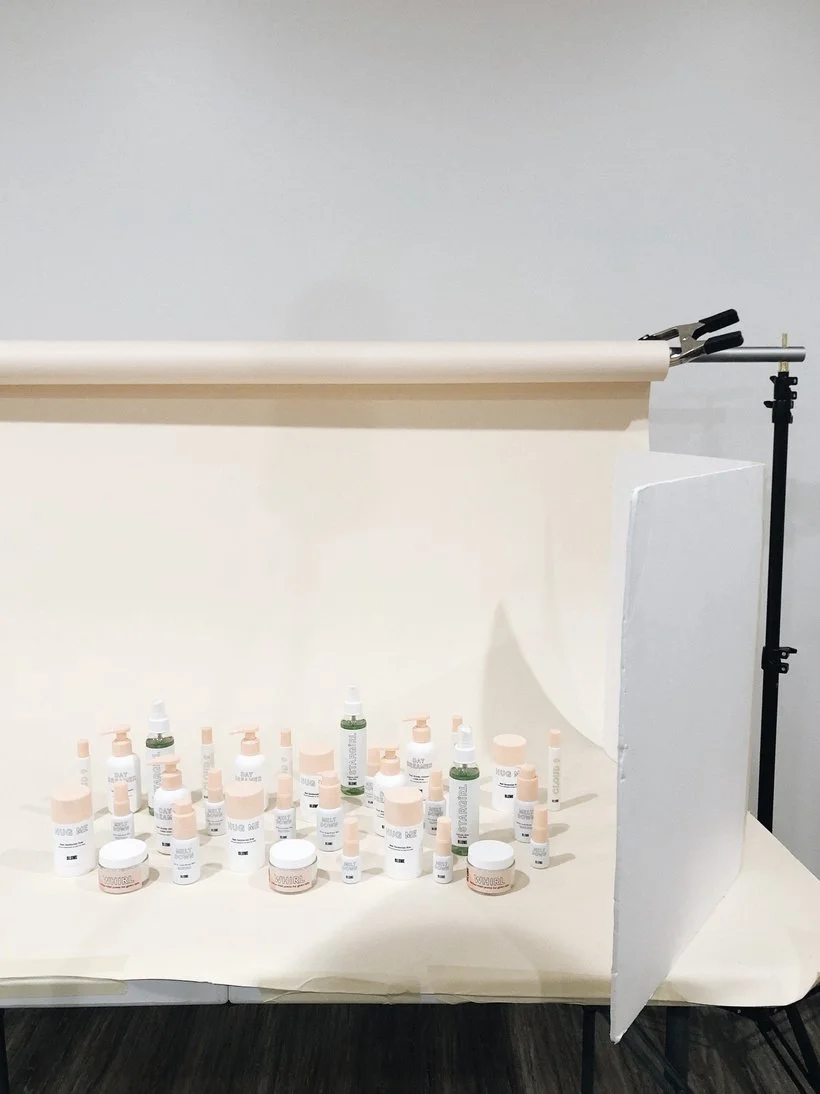
The most common way to use a white card is to just place it near your products or your scene without it getting in the way of the shot. Since we're almost always shooting with our one strobe light for a hard light look, we like to place our white card on the opposite side of where our light source is. We do this so that the light is bouncing back into the side of the scene where the shadows are occurring. You would do the same if you were shooting in natural light either against a window or in direct sunlight and always placing the white card next to the shadows. That is the most common way that you can use a white card. Depending on your style or the client's branding, you may decide to use a white card or not. Maybe the dark and moody vibe fits better with what you're photographing and that's cool too. I think it's important to have a clear understanding of the role your lighting will have in your images to best capture the look you are going for.
Reflective Objects or Labels
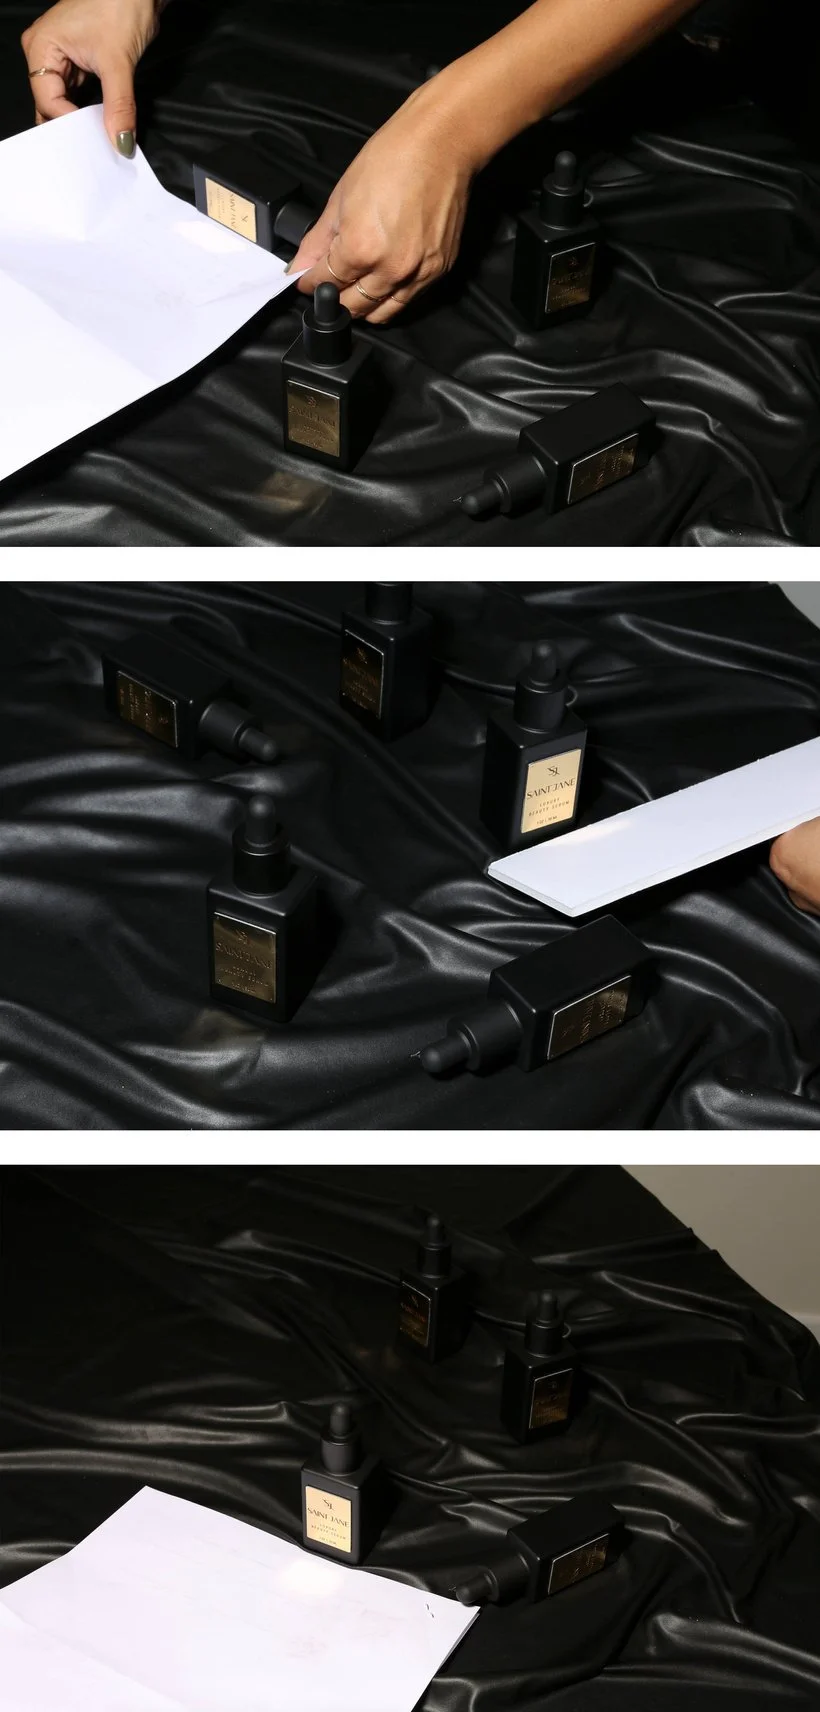
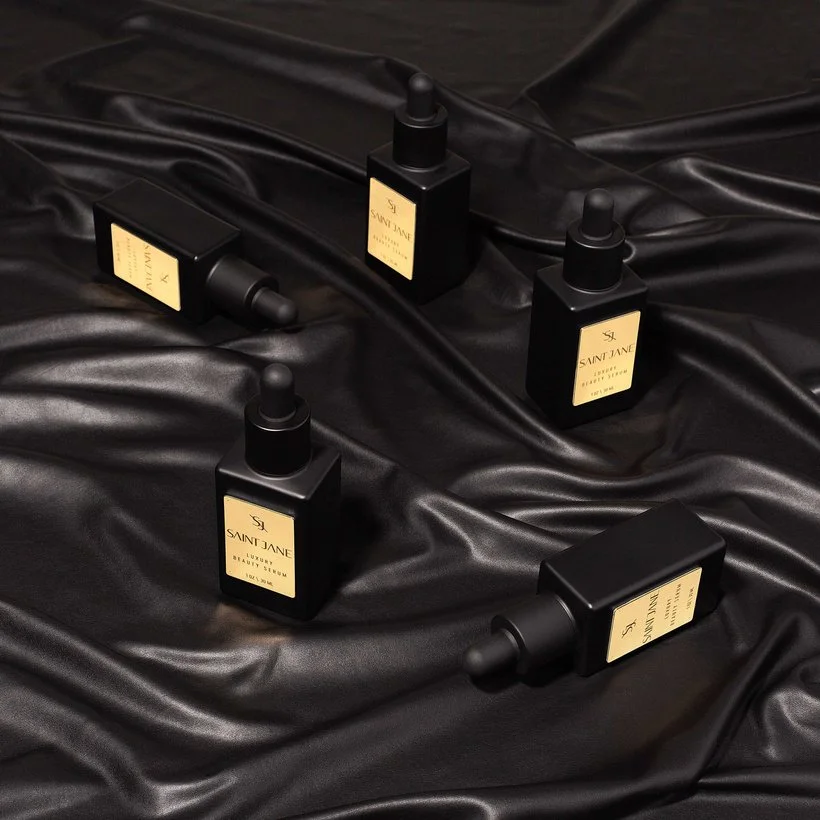
Ok, now that we've gotten that out of the way, let's get into some fun ways that white cards have come in handy. Anyone work with pesky reflective objects or product labels? I'm not sure about you guys but those types of products are the most frustrating to shoot. It is especially challenging when you're working with limited lighting or trying to light multiple reflective products in one scene that are all placed in different ways. It's kind of a nightmare. With that being said, we've found a quick little way to use our white cards to help us with that. The trick is to reflect light into each product or label separately and then composite it all together in post. When we need to illuminate something small, we'll usually cut up a smaller piece of a foam core and place it next to the objects. Sometimes, foam core might be too thick so you'll want to use something thinner like a sheet of printer paper. Works like a charm. For round objects, you'll typically want to use a larger white card to cover more surface area. One last thing to be aware of is how close your white card is to your subject. Getting too close may blow out the product/label so make sure to try different distances to get it right.
The Final Image:
Fake Window or Blinds
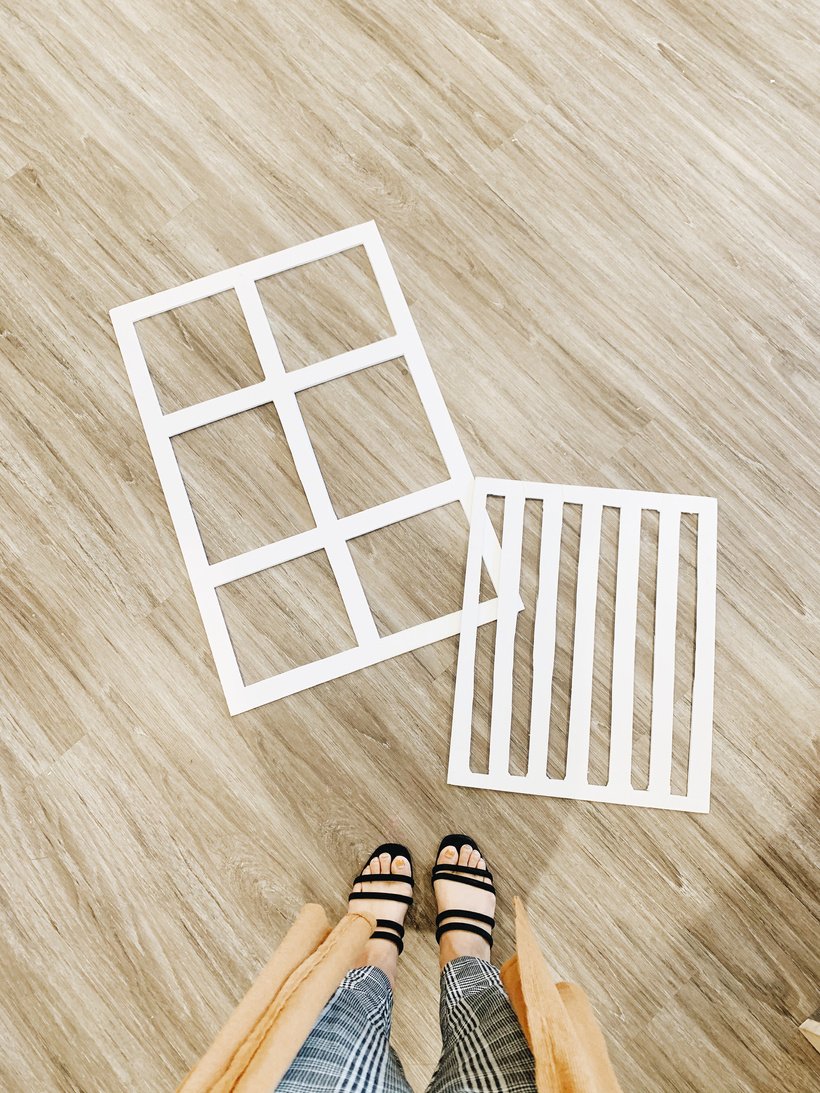
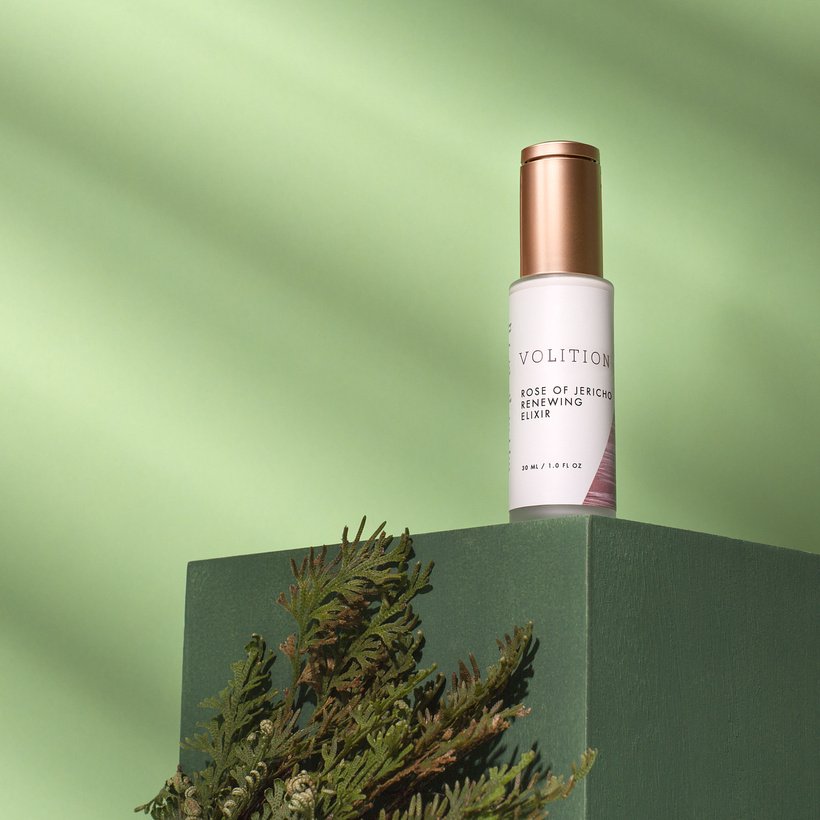
Another really fun way to use white cards is to create fun lighting effects to mimic a window or blinds. This will honestly take a bit of experimentation because the effect truly depends on how you cut the white card and the angle and distance at which you hold it in front of the light. This method may not work as well with natural light, I recommend only doing this if you're shooting in direct sunlight or if you're using a strobe. This is mostly to do with the fact that the effect may not even be noticeable at all because the light source is so diffused. The way to make this fake window happen is you'll want to cut out about 6 squares, or whatever makes sense for the size of foam core you have, as long as they're evenly spaced. See image below. For blinds, you'll want long vertical rectangles evenly spaced out and depending on the look you're going for, you can make them thin or wide. I recommend starting thin because you can always cut more if the effect isn't as strong. In the example image below of the Volition Beauty product, we had cut out the "blinds" a bit too wide and I think it made the effect a lot softer so I would definitely start thin and experiment from there.
Example of fake window:
Example of fake blinds:
V-Flats for Portraits
Something we recently added to our studio that we're pretty excited about is a pair of foldable, black & white, dual-sided V-Flats. These things are not cheap, let me tell you! We've wanted some of these for a little while now but couldn't justify the price. However, now that we've got clients specifically asking for shoots that include models, we felt that maybe it was time we made that purchase (and may have charged part of it to the client hehe) and we're super happy about it. V-flat is just a fancier word for a really large white reflector. These are especially useful for portraits or model shoots where you need to bounce a lot of light or maybe you need to light your background evenly. There are tons of ways to use these guys and the best part is they are light and can fold down so they don't take up as much space. They're actually really well made and for a little while I had contemplated creating a DIY version but I don't think it would have been as sturdy. If you're feeling up for the challenge though, here's a few videos of how you can make your own inexpensive version.
Where to buy?
Literally anywhere. Your local department store, CVS, Walgreens, Michaels, etc. You can even find them at the dollar store I believe as long as you look in the school and office supplies section. They are cheap and last forever. I recommend getting a few different sizes in case you ever decide to cut them up or if you'd like to create a mini v-flat for product shoots. In the photo below, you'll see I have a small foldable white card that I created by combining two smaller foam core boards and taping the inside and outside so that it can stand up on its own easily.
Hope you found this post helpful and if you guys have any fun ways that you like to use your white cards that we don't know about or mentioned here, comment below or share with the community over on Discourse!
Is it the weekend yet?
Arabela