

Blending Modes: Soft Light
Hi all! This year is truly flying by and I can't believe we're almost at the end of March. Anyone else feel like there's not enough time in the day to do all the things? Maybe it's just me... haha! Anyway, I'm here to continue this series on Blending Modes that I started a while back. If you'd like a refresher on that first post, be sure to head here. In it, I gave a brief explanation on what blending modes in Photoshop actually are, how they can be used, and why the "Color" blending mode is important for product photography retouching. Not to mention, the different ways that it can be applied during post-production. So yeah... it's a great introductory post and I highly recommend checking it out first.
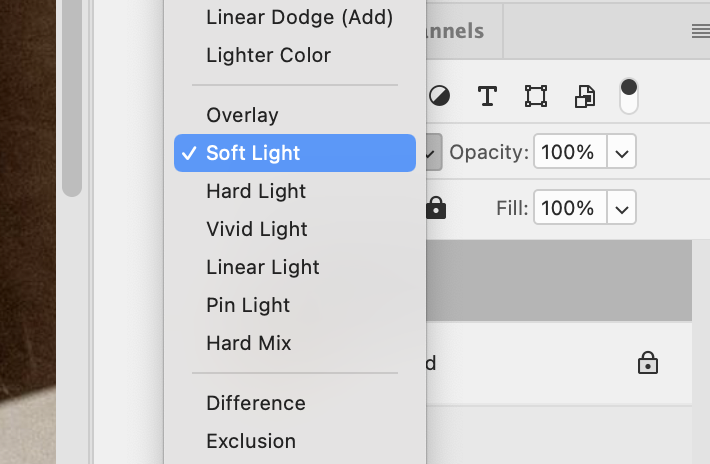
For this post, however, we're going to be diving into the "Soft Light" blending mode. By definition, it's a blending mode that either brightens or darkens depending on the blend color you are using. For example, let's say your blend color is a light yellow, then wherever you apply it, it will brighten with a light yellow tint. Now if you're painting with a dark blue color for example, then it's only going to darken the area while giving it a blue shade. "Soft Light" is similar to "Overlay" but it applies in a much more subtle way. There are quite a few ways to use Soft Light in post-production and I'm going to be sharing two that we like to use plus one additional method that is often used by creative photographers. Let's get into it shall we?

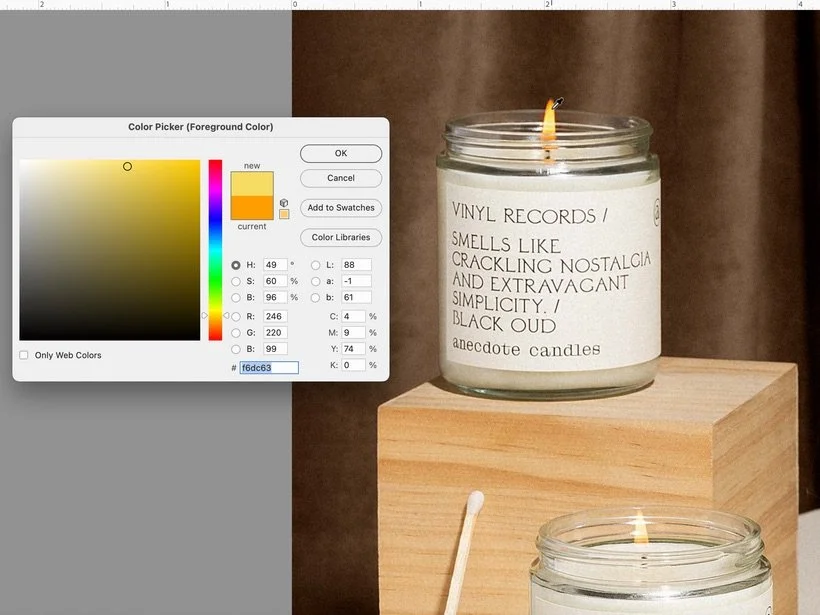
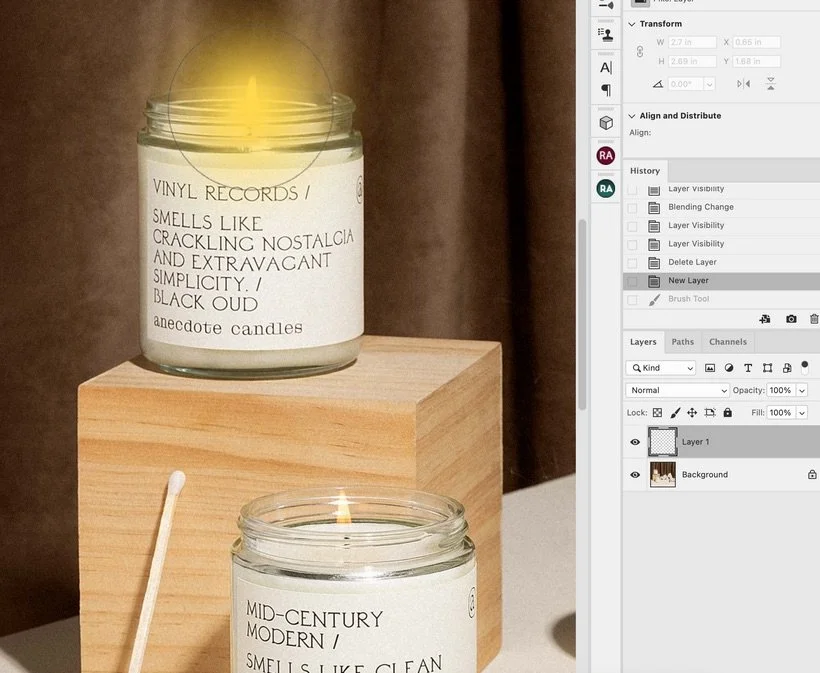
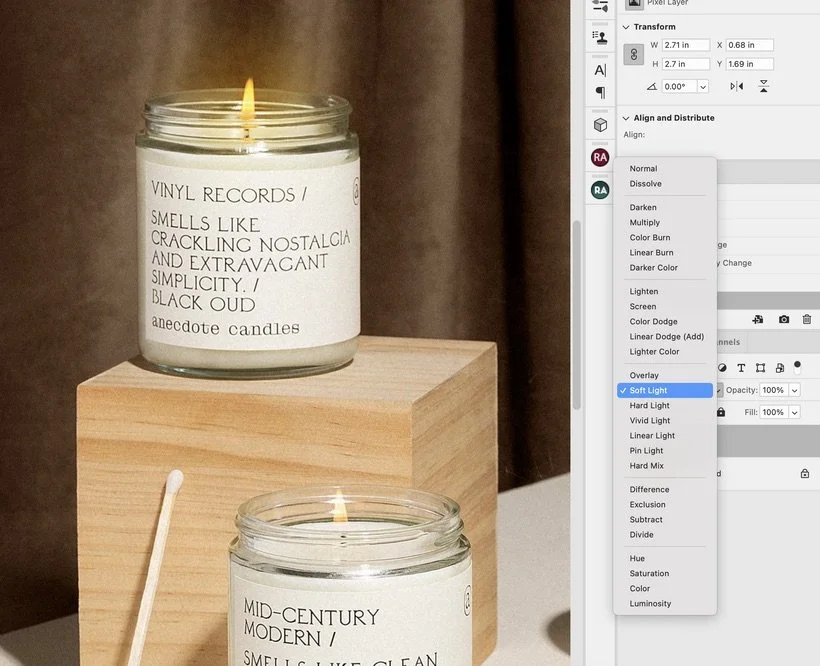
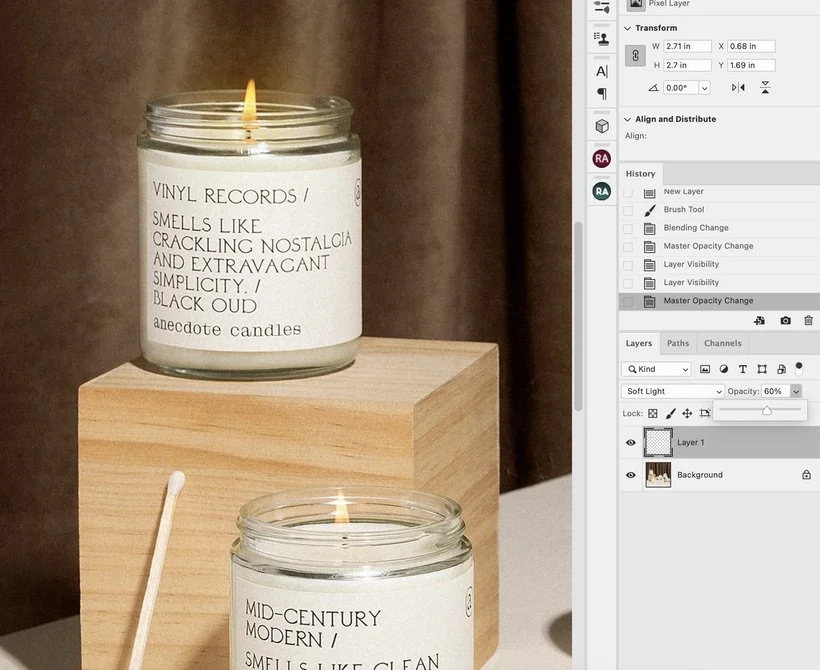
I like to think of Soft Light as one of the blending modes that helps make things glow! If you've ever watched one of those illustration livestreams on Adobe Live, you might have seen someone applying a glow via the Soft Light blending mode. And if you have no idea what I'm talking about, then watch this Adobe Live stream. Now why would making something glow be useful in product photography? Well, let's say you love using strobe lights like we do and anytime you've ever captured lit candles or small fairy lights, you know exactly how washed out it can look. Therefore, adding that bit of glow helps to make it feel more realistic. My go-to method is to always create a new layer, grab my eyedropper tool and select a color that's emitting from the source that I want to add the glow to. For example, if it's candlelight, then it's likely to be some kind of yellow or golden color that's coming from the flame. Next, I'll take a really large, soft brush at 100% opacity and click once on the area I'd like to make glow. At this point you can change the blending mode to Soft Light to see how the color applies. From there, it's easy to adjust the opacity of the layer to bring it back down and make it more subtle. See below for a visual example of what I just explained.
I like to think of Soft Light as one of the blending modes that helps make things glow! If you've ever watched one of those illustration livestreams on Adobe Live, you might have seen someone applying a glow via the Soft Light blending mode. And if you have no idea what I'm talking about, then watch this Adobe Live stream. Now why would making something glow be useful in product photography? Well, let's say you love using strobe lights like we do and anytime you've ever captured lit candles or small fairy lights, you know exactly how washed out it can look. Therefore, adding that bit of glow helps to make it feel more realistic. My go-to method is to always create a new layer, grab my eyedropper tool and select a color that's emitting from the source that I want to add the glow to. For example, if it's candlelight, then it's likely to be some kind of yellow or golden color that's coming from the flame. Next, I'll take a really large, soft brush at 100% opacity and click once on the area I'd like to make glow. At this point you can change the blending mode to Soft Light to see how the color applies. From there, it's easy to adjust the opacity of the layer to bring it back down and make it more subtle. See below for a visual example of what I just explained.
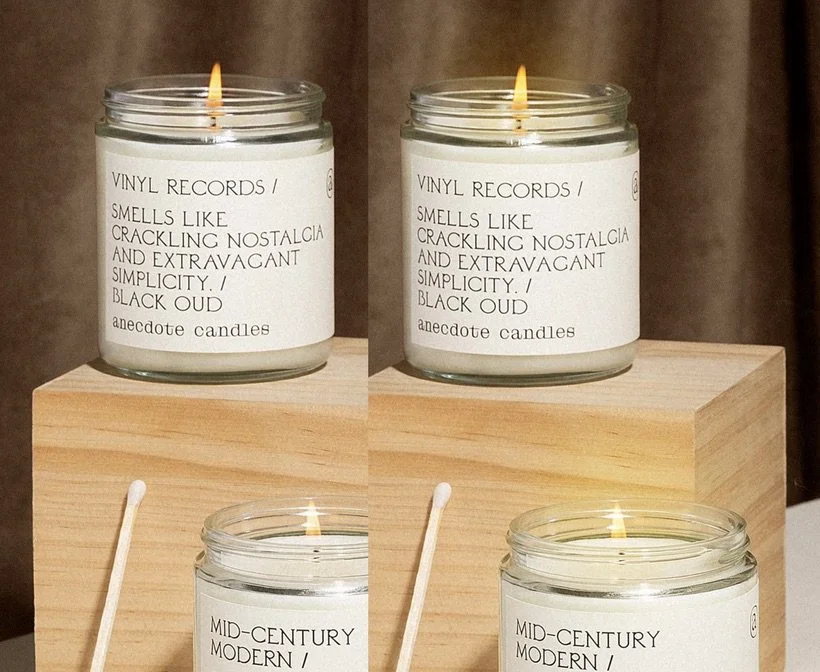
Before & After:
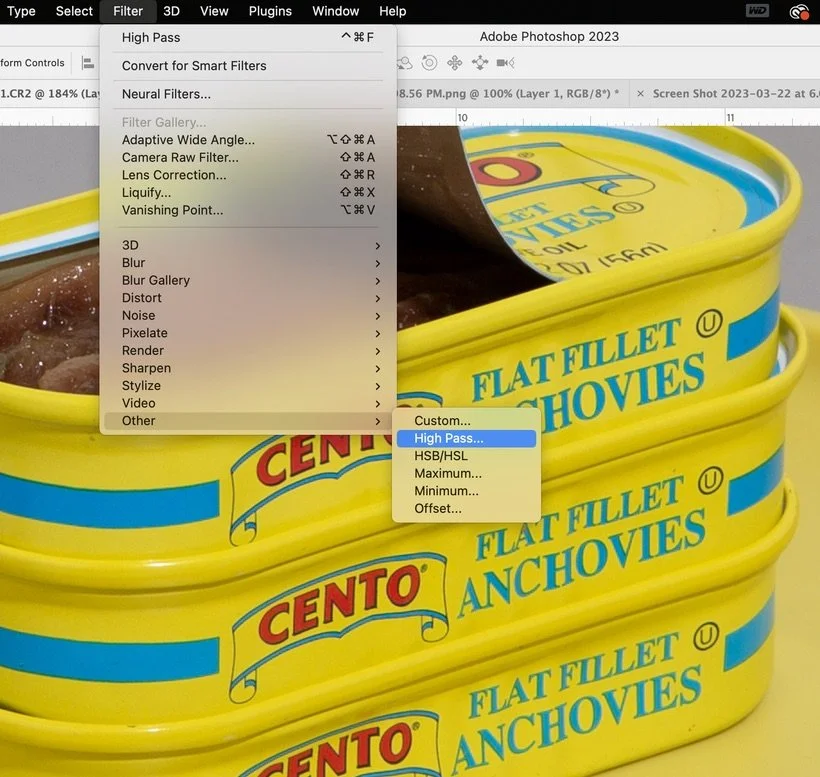
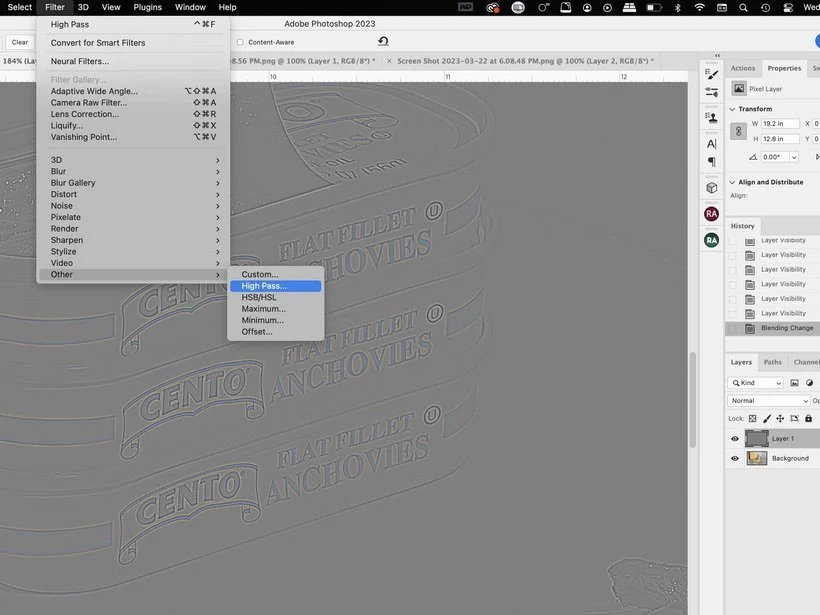
Another way that Soft Light can be used in product photography is to sharpen your images, more specifically logos and text on packaging. When it comes to getting that crisp and overly sharpened look, our go-to blending mode is "Linear Light" BUT.... there are times when a more subtle approach is needed and that's where Soft Light truly shines! (Get it? SHINE, GLOW! Jk... Haha!) So, how do we achieve a subtle sharpen? Well, same way that we always like to do it. By duplicating your image layer, heading to Filter > Other > High Pass... Then selecting anywhere from 1.5 to 2.0 as the radius. After that, you change the blending mode to "Soft Light" and you have a beautiful and subtle sharpen. Below you'll find an example of this method in action. Pay close attention to the text on the tins and the actual anchovies themselves to see the sharpened effect.
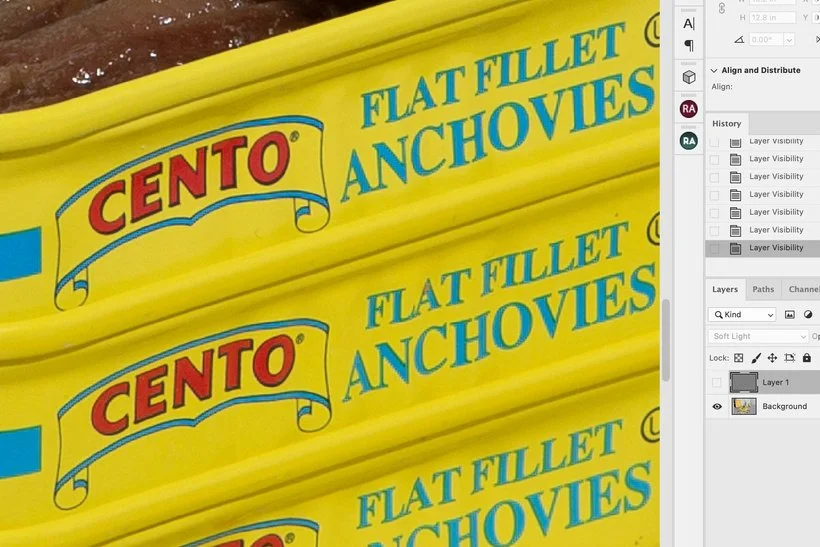
Not Sharpened:
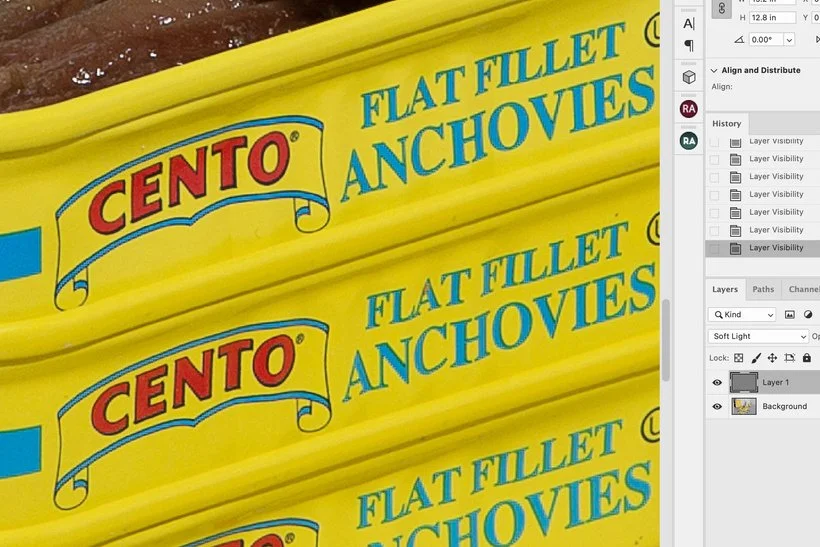
Sharpened:
And lastly, another way that creatives use the Soft Light blending mode is to dodge and burn. As I mentioned earlier, using a light blend color will lighten while a dark blend color will darken. Therefore, this blending mode can be a great tool for doing just that. Although this isn't typically the way that we personally dodge and burn our images, it definitely works for other people. Essentially what you're doing is creating a new layer, filling it with 50% gray, and then changing the blending mode to Soft Light. From here, you'll paint with either white or black while using a small soft brush to paint the areas that you'd like to lighten and darken. Simple right? Here's a quick 5 minute tutorial on how to do this exact method. Some people like to separate the Dodge and Burn into two separate layers with 50% gray each or just keep it on the same layer but it's totally up to you on how you'd like to apply the blending mode.
And that's how you use Soft Light folks! Easy peasy right? Gotta love blending modes. Let me know what you think of these methods and if there are any other ways that you personally like to use Soft Light for. :)
Is it the weekend yet?
Arabela