

Creating Levels in Your Images
Hello Weekend Club Members!!
Today we're going to talk about using levels and hight variation in your styling. While there are definitely times when it could make sense to have all of your products on the same plane, oftentimes you will need levels, not just for aesthetic reasons, but to create emphasis or to fit more objects into a shot. So let's talk through these different scenarios!
Levels Help Add Interest
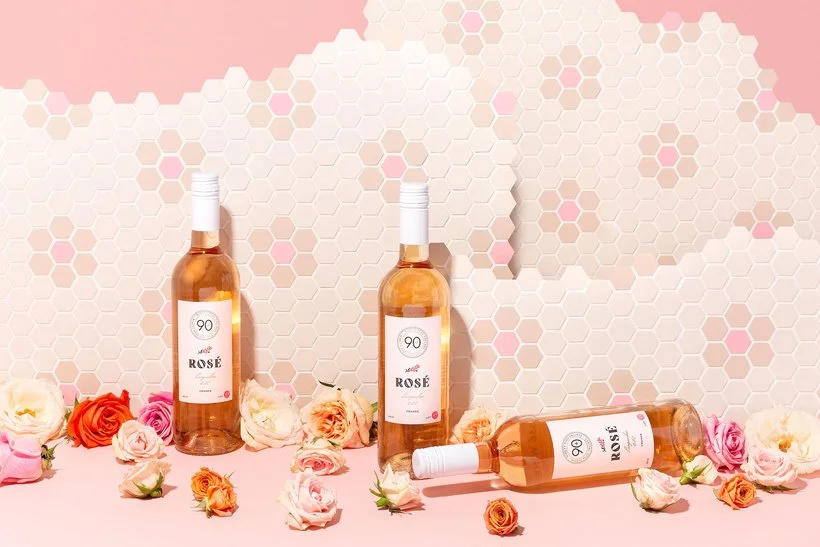
Oftentimes, images that have all of the props on one level just aren't quite as interesting. The human eye naturally wants to move through an image, and when everything is on the same plane then there aren't as many places for it to move around to. While you can achieve levels by using blocks or other items to elevate your props and products, you can also quickly and easily create a level just by laying an item down as show in the first image above. In that image, there is also height variation in the background which adds even more interest. If all of the bottles were standing up, it would still be a fine photo, but to have one laying down, or to have one elevated above the others can really add to the image.
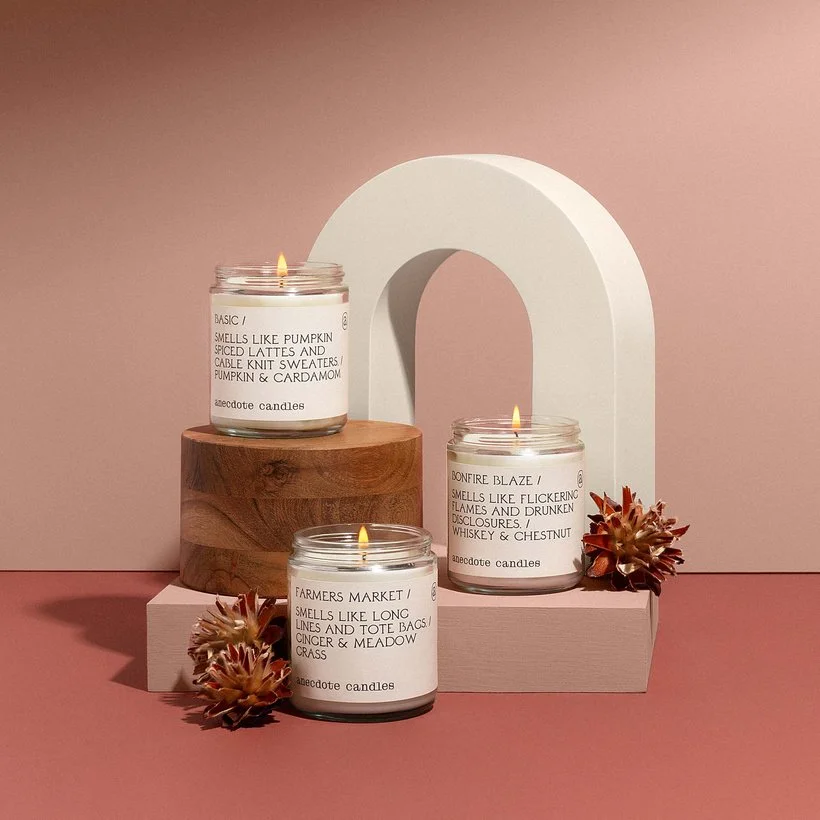
In the second shot above, you can see how the levels allow the eye to flow from the first candle to the second and then to the third. If they were all on the same level, the eye wouldn't be directed so smoothly. While this might not be the case in every single image, and there are times when it definitely makes sense to have all items on the same plane, it's something to think about as you're styling your images.
Levels Provide Balance
Having levels provides interest when your items are of a similar height, but sometimes having TOO much of a difference in height can offset the balance of an image. This is where it can be helpful to use blocks or other items to bring two items closer to the same level. This is especially important when two things are both important because oftentimes the taller object will seem more significant. It can also help when two items are just really different in size, if you prop up the smaller one, it can help them seem more equal.
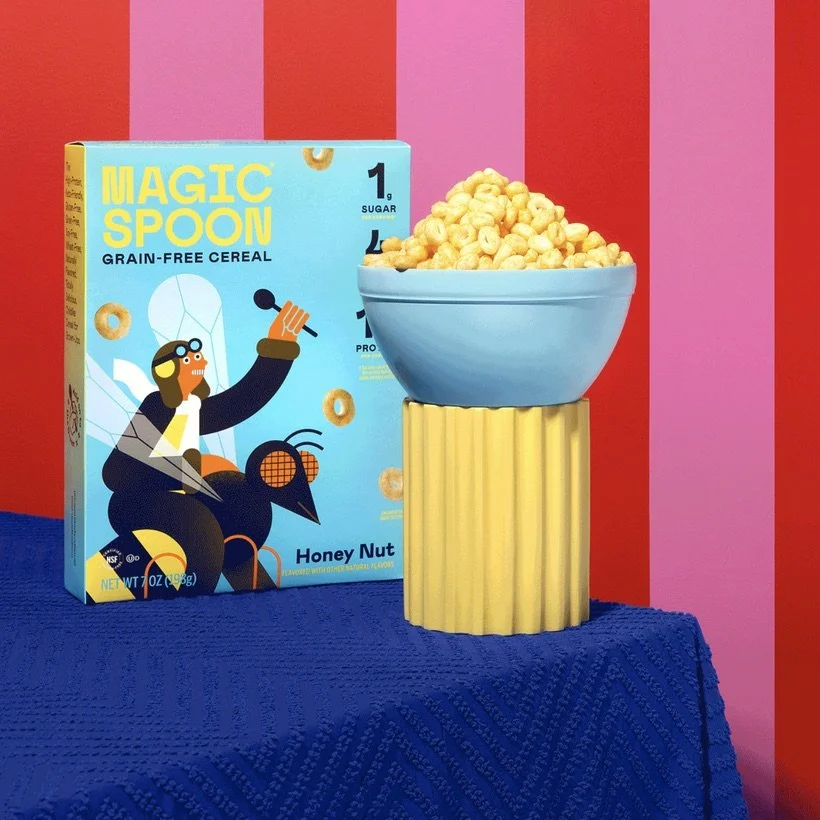
You can see in the image above that the cereal box and bowl of cereal are very different heights. We used the column to prop up the bowl so it would be closer in height to the box but still a little shorter so there is still a little bit of variation. Using levels to bring your items closer together can help make sure your image is balanced and pleasing to the eye.
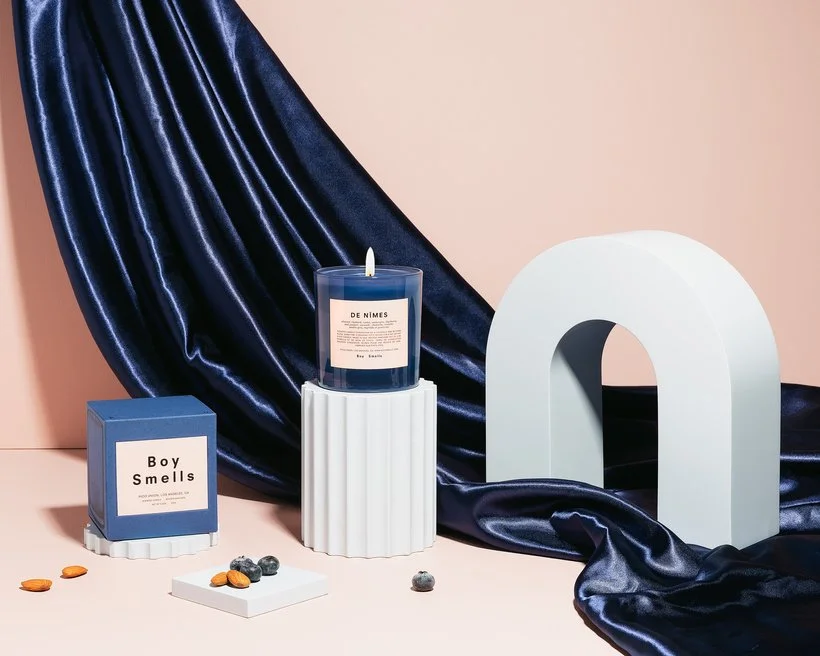
Levels Bring Attention to Important Objects
As I mentioned, the tallest object in your image will often be seen as the most important. An easy way to bring attention to a specific item in your shoots is to make it the highest object, and/or to put it on a stand so that people can recognize its significance. There are other ways that you can draw attention to an object such as using color, but this is a really easy way to make sure that importance is shown.
In the first image above, putting the candle on a column in the very center made it the focal point of the photo. In the second image, (lol at how many candle photos are included in this post) while it was a group shot, the client had mentioned that one scent was more popular and important than the others. Because of this, we made sure to prop it up higher than the other scents.
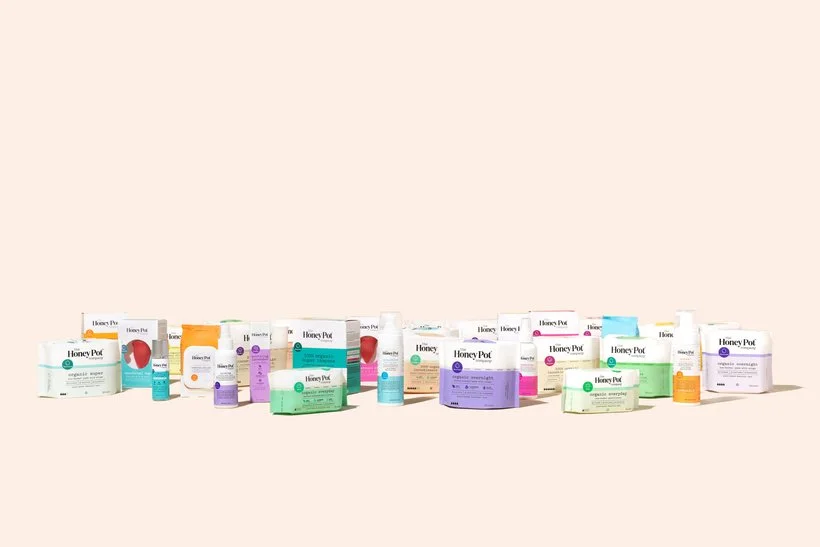
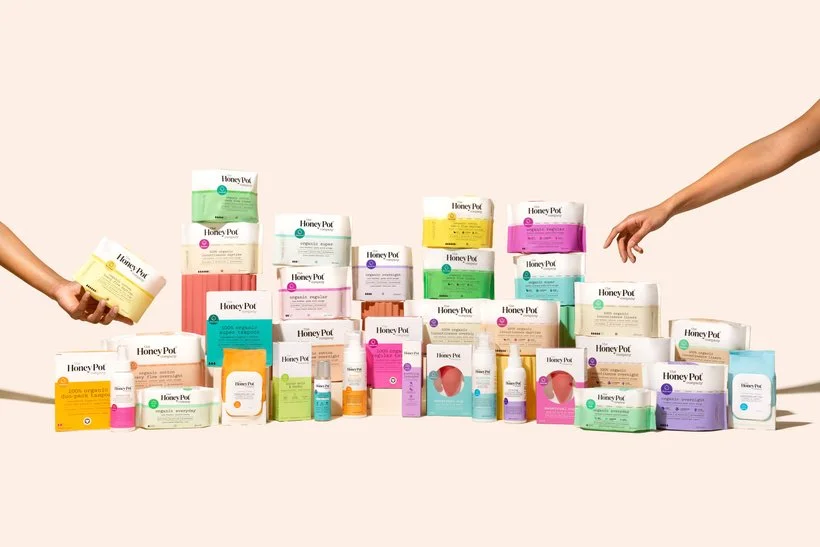
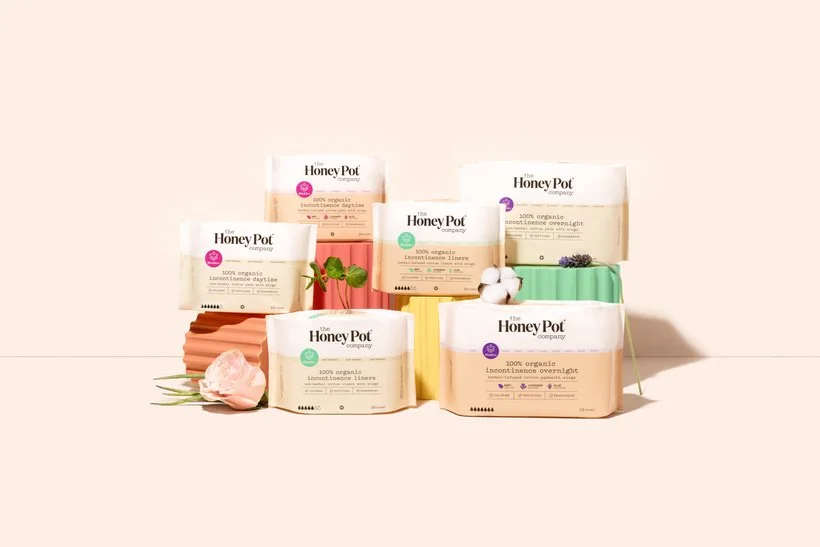
Levels Help You Fit More Into the Scene
Using levels is super helpful when you need to fit a lot of objects into one scene. Putting objects onto blocks or other stands will help you to maximize the space in the image, especially if you have a small set or if you're trying to work within specific dimensions. This has saved us many times when we were asked to shoot a lot of products at once.
As you can see in the first image, without levels you can't really see all of the products very well. That was intentional in this image as the goal was to just fill the scene with a ton of products. In the second image we used levels to actually show all of the different products that this company offers. Without using blocks and columns, there wouldn't be an easy way to do this. Keep this in mind when you have a client who requests a group shot with a ton of products, you're most likely going to need levels in order to not lose any of the objects.
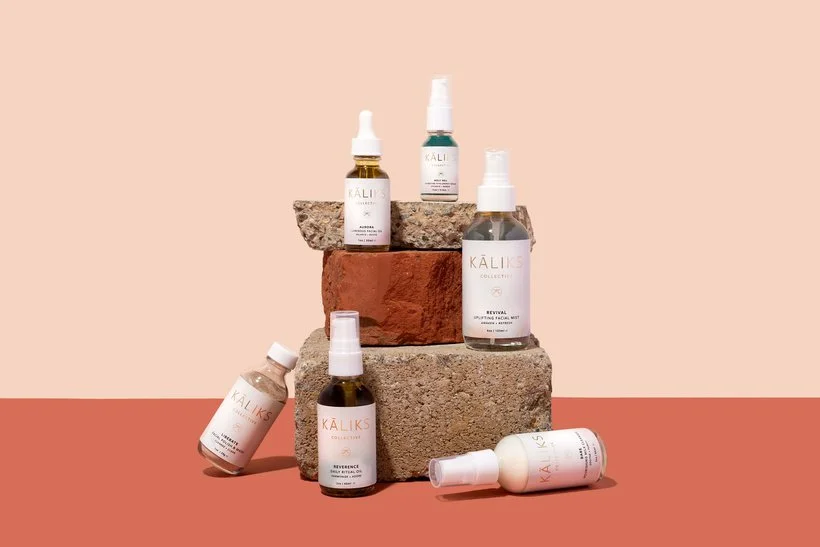
Levels Can Help to Set the Scene
Like we always say, every single thing that you use in your images will communicate something, and the same is true for what ever objects you use to create levels. Once you've decided that you want or need to create levels in your image, you then need to decide what would make the most sense for that specific set. Blocks are always an easy choice, but since they're clean and geometric, they may not make sense in an image that's more natural and organic or in a shot that is more real-life.
Think about what you want the image to say, what story you're telling and that will help you decide what would make the most sense. The two images above are very similar, but the thing that differentiates them from each other are the objects used to as levels making one look more playful and colorful and the other more muted and natural.
I hope that this conversation was helpful for you as you think through and plan out your shoots. If you have any thing to add, feel free to leave a comment below!
Is it the weekend yet?
Elle